- Products ProductsLocation Services
Solve complex location problems from geofencing to custom routing
PlatformCloud environments for location-centric solution development, data exchange and visualization
Tracking & PositioningFast and accurate tracking and positioning of people and devices, indoors or outdoors
APIs & SDKsEasy to use, scaleable and flexible tools to get going quickly
Developer EcosystemsAccess Location Services on your favorite developer platform ecosystem
- Documentation DocumentationOverview OverviewServices ServicesApplications ApplicationsDevelopment Enablers Development EnablersContent ContentHERE Studio HERE StudioHERE Workspace HERE WorkspaceHERE Marketplace HERE MarketplacePlatform Foundation and Policy Documents Platform Foundation and Policy Documents
- Pricing
- Resources ResourcesTutorials TutorialsExamples ExamplesBlog & Release Announcements Blog & Release AnnouncementsChangelog ChangelogDeveloper Newsletter Developer NewsletterKnowledge Base Knowledge BaseFeature List Feature ListSupport Plans Support PlansSystem Status System StatusLocation Services Coverage Information Location Services Coverage InformationSample Map Data for Students Sample Map Data for Students
- Help
Custom map styles
The HERE SDK for Android provides a flexible solution to customize the map by loading custom map schemes.
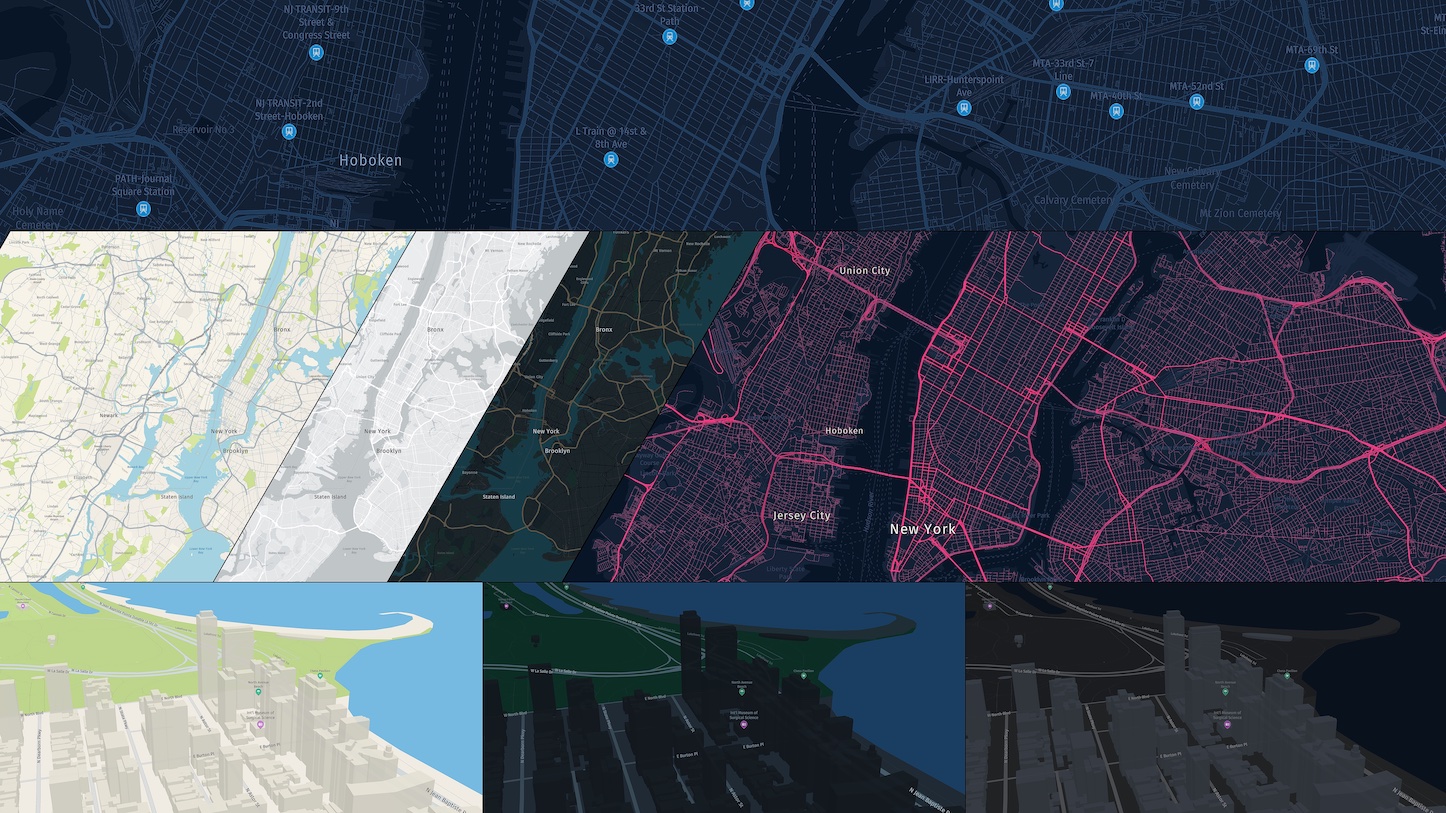
If you are looking for predefined map styles, see the Quick Start guide for an introduction. The HERE SDK already includes a set of pre-configured map styles such as MapStyle.NORMAL_DAY or MapStyle.SATELLITE.
Create and load custom map styles
The most flexible solution to customize the map is to create your own map styles using a configuration file generated with the WYSIWYG HERE Style Editor.
Note
The web-based unified HERE Style Editor is available on the HERE platform. It is compatible with the Maps API for JavaScript (JSAPI) and the HERE SDK since version 4.12.1.0. Custom map styles that have been made with the legacy desktop editor need to be migrated to the new HERE Style Editor format. Get in touch with your HERE representative to discuss potential style updates from legacy editions.
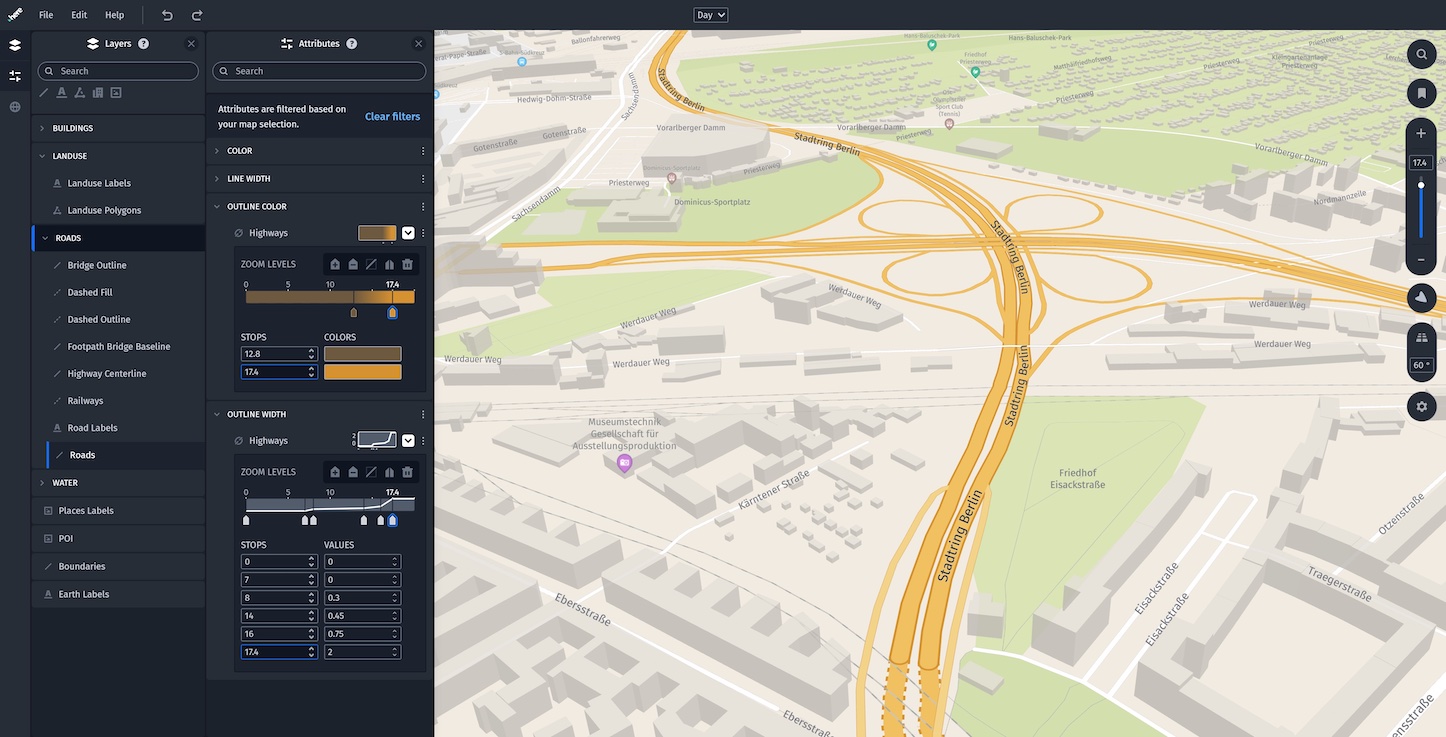
In order to use the HERE Style Editor, perform the following steps:
- Sign-up for an account on the HERE platform.
- Confirm and finalize your account generation by providing addition details.
- Select HERE Style Editor from the Launcher Menu on your landing page on the HERE platform or use this direct link after signing in.
- Start utilizing the HERE Style Editor by selecting one of the existing base styles you want to customize.
- Apply your customizations to the map style.
- Finalize your work by exporting the customized map style to your local computer via File -> Export Map Style and load it to your application as described below.
Copy the resulting JSON file into the "assets" directory of your project. If not already added, you can add that folder via Android Studio (Right-click on the project: New -> Folder -> Assets folder). You can also manually generate the folder.
Load the style into a map scene as follows:
private void loadMapStyle() {
    // Place the style into the "assets" directory.
    // Full path example: app/src/main/assets/mymapstyle.json
    // Adjust file name and path as appropriate for your project.
    String fileName = "custom-dark-style-neon-rds.json";
    AssetManager assetManager = context.getAssets();
    try {
        assetManager.open(fileName);
    } catch (IOException e) {
        Log.e("CustomMapStylesExample", "Error: Map style not found!");
        return;
    }

    mapView.getMapScene().loadScene("" + fileName, new MapScene.LoadSceneCallback() {
        @Override
        public void onLoadScene(@Nullable MapError mapError) {
            if (mapError == null) {
                // Scene loaded.
            } else {
                Log.d("CustomMapStylesExample", "onLoadScene failed: " + mapError.toString());
            }
        }
    });
}
In the above snippet, we use Android's AssetManager to verify that the *.json file exists at the expected location.
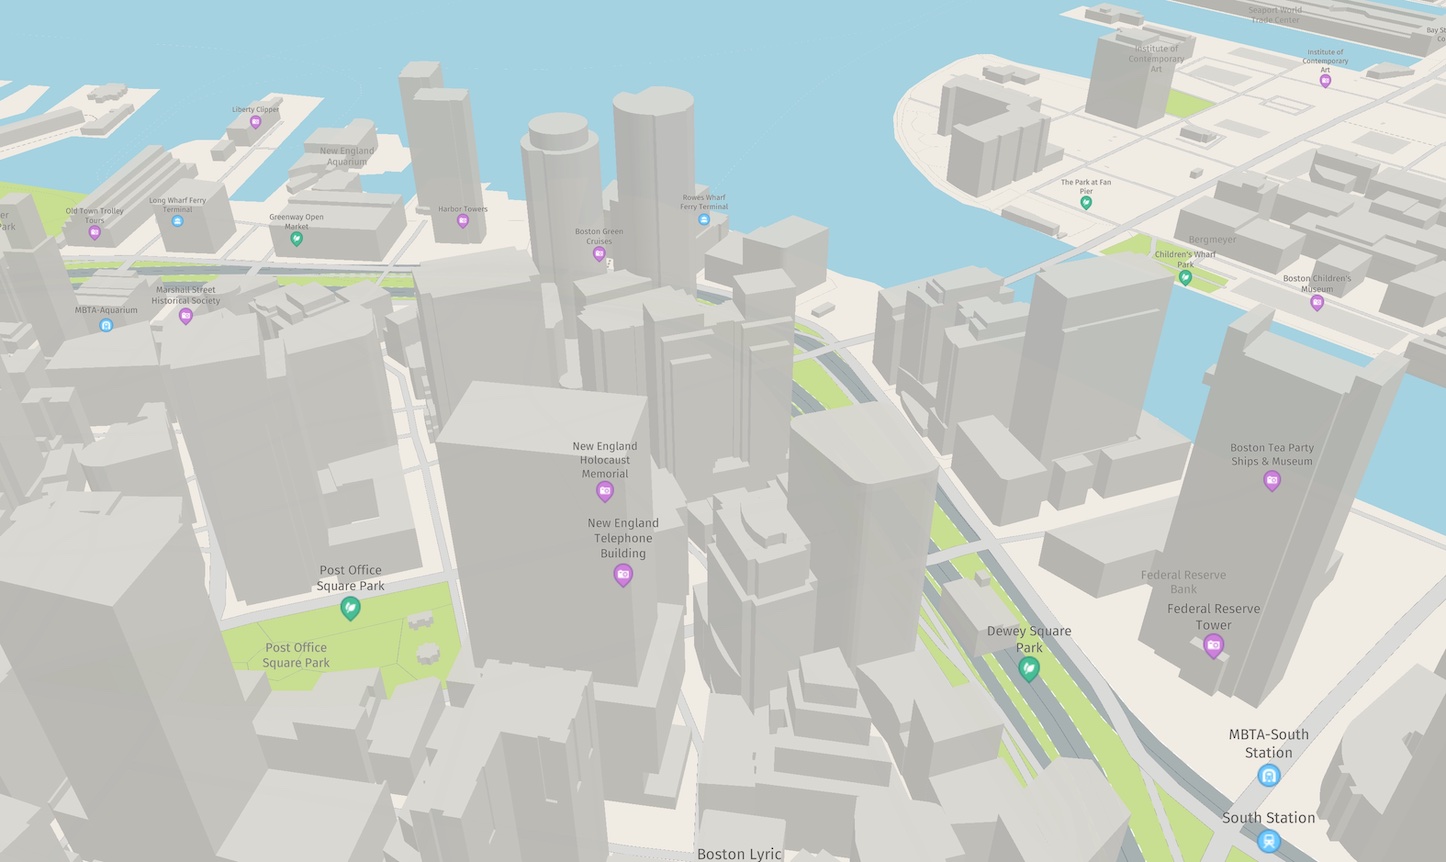
Using custom map styles can be very effective to differentiate your app from other map applications. In addition, it is possible to change map styles on-the-fly, for example, to shift the user's attention to certain map elements based on the current state of your app.
Note
You can find a CustomMapStyles example app on GitHub.
Load custom raster layers
Another alternative to customize the map's look is to add your own raster tile service on top of the HERE map styles. This can be your own server where you host tiles that you want to show as an overlay on top of selected areas of the world - or a public tile server such as OpenStreetMap. Fully opaque and transparent map tile overlays are supported. It is also possible to add more than one raster layer to the map at the same time.
Note
Note that this is a beta release of this feature, so there could be a few bugs and unexpected behaviors. Related APIs may change for new releases without a deprecation process.
To add custom raster layers, you need to create a RasterDataSource. A RasterDataSource represents the source of raster tile data to display. It also allows changing its configuration. With a RasterDataSourceConfiguration you can specify a configuration for the data source, including URL, tiling scheme, storage levels and caching parameters.
Finally, with the MapLayerBuilder you can create a MapLayer to add a renderable map overlay to the map.
- Use
MapLayerVisibilityRangeto specify at which zoom levels the map layer should become visible. - Use the
MapLayerPriorityto specify the draw order of theMapLayer. - Use the
MapContentTypeto specify the type of data to be shown by theMapLayer.
In case of raster tile images, use MapContentType.RASTER_IMAGE.
Default map gesture actions such as pinch, rotate and zoom behave in the same way for raster tiles as for HERE vector maps - except for a few differences: For example, raster tiles are loaded as bitmaps and therefore a rotated raster map tile rotates all labels and street names contained together with the tile.
Note
When loading a map scene with a custom map style or the default map style, the map will be rendered using vector tiles where the map information is represented as vector data consisting of vertices and paths for better scalability and performance. By contrast, raster tiles are regularly-spaced and square, and consist of bitmap images that represent only pixel information. Note that the satellite map style is also raster based.
Create a RasterDataSource as follows:
private RasterDataSource createRasterDataSource(String dataSourceName) {
    // The URL template that is used to download tiles from the device or a backend data source.
    String templateUrl = "https://stamen-tiles.a.ssl.fastly.net/toner/{z}/{x}/{y}.png";
    // The storage levels available for this data source. Supported range [0, 31].
    List<Integer> storageLevels = Arrays.asList(2, 3, 4, 5, 6, 7, 8, 9, 10, 11, 12, 13, 14, 15, 16);
    RasterDataSourceConfiguration.Provider rasterProviderConfig = new RasterDataSourceConfiguration.Provider(
            TilingScheme.QUAD_TREE_MERCATOR,
            storageLevels,
            TileUrlProviderFactory.fromXyzUrlTemplate(templateUrl));

    // Raster tiles are stored in a separate cache on the device.
    String path = "cache/raster/toner";
    long maxDiskSizeInBytes = 1024 * 1024 * 128; // 128 MB
    RasterDataSourceConfiguration.Cache cacheConfig = new RasterDataSourceConfiguration.Cache(path, maxDiskSizeInBytes);

    // Note that this will make the raster source already known to the passed map view.
    return RasterDataSource(mapView.getMapContext(),
            new RasterDataSourceConfiguration(dataSourceName, rasterProviderConfig, cacheConfig));
}
Note that - if desired - you can also hook into the calls of the templateUrl like so:
RasterDataSourceConfiguration.Provider rasterProviderConfig = new RasterDataSourceConfiguration.Provider(
        TilingScheme.QUAD_TREE_MERCATOR,
        storageLevels,
        new TileUrlProviderCallback() {
    @NonNull
    @Override
    public String onTileUrlRequest(int x, int y, int level) {
        return "https://stamen-tiles.a.ssl.fastly.net/toner/" + level + "/" + x + "/" + y +".png";
    }
});
The latter gives you an option to listen to each tile request and, for example, allows for finer control on the requested tiles, if needed.
Note that custom raster layers use their own cache directory, which can be independent of the map cache that is used for vector-based map data. See RasterDataSourceConfiguration.
This code uses a tile source from Stamen Design, which can be used under the CC BY 3.0 license. The data itself comes from OpenStreetMap. For more information visit http://maps.stamen.com/#watercolor/12/37.7706/-122.3782.
Note that you can also use other tile sources that follow the OSM standard style format /zoom/x/y.png. The templateURL should look like this:
https://YourRasterTileService.com/{zoom}/{xTile}/{yTile}.png
Here, the zoom value represents the map's current zoom level, and xTile and yTile defines the horizontal and vertical tile numbers. For example, to show the standard OSM map, use the following template URL:
let templateUrl = "https://a.tile.openstreetmap.org/{z}/{x}/{y}.png"
More tile servers following the OSM format are listed here. Note that the HERE SDK supports only tile servers. Servers that provide vector data are not supported. Vector based tiles can only be used with the HERE Style Editor and the embedded map styles (see above).
Once a tile source is created, a MapLayer can be built:
private MapLayer createMapLayer(String dataSourceName) {
    // The layer should be rendered on top of other layers.
    MapLayerPriority priority = new MapLayerPriorityBuilder().renderedLast().build();
    // And it should be visible for all zoom levels.
    MapLayerVisibilityRange range = new MapLayerVisibilityRange(0, 22 + 1);

    try {
        // Build and add the layer to the map.
        MapLayer mapLayer = new MapLayerBuilder()
                .forMap(mapView.getHereMap()) // mandatory parameter
                .withName(dataSourceName + "Layer") // mandatory parameter
                .withDataSource(dataSourceName, MapContentType.RASTER_IMAGE)
                .withPriority(priority)
                .withVisibilityRange(range)
                .build();
        return mapLayer;
    } catch (MapLayerBuilder.InstantiationException e) {
        throw new RuntimeException(e.getMessage());
    }
}
And finally, the MapTile's visibility can be controlled by enabling or disabling the layer. Note that we also need to provide a unique name. Each RasterDataSource can be created only once:
String dataSourceName = "myRasterDataSourceTonerStyle";
rasterDataSourceTonerStyle = createRasterDataSource(dataSourceName);
rasterMapLayerTonerStyle = createMapLayer(dataSourceName);

rasterMapLayerTonerStyle.setEnabled(true);
The resulting layer looks like this:
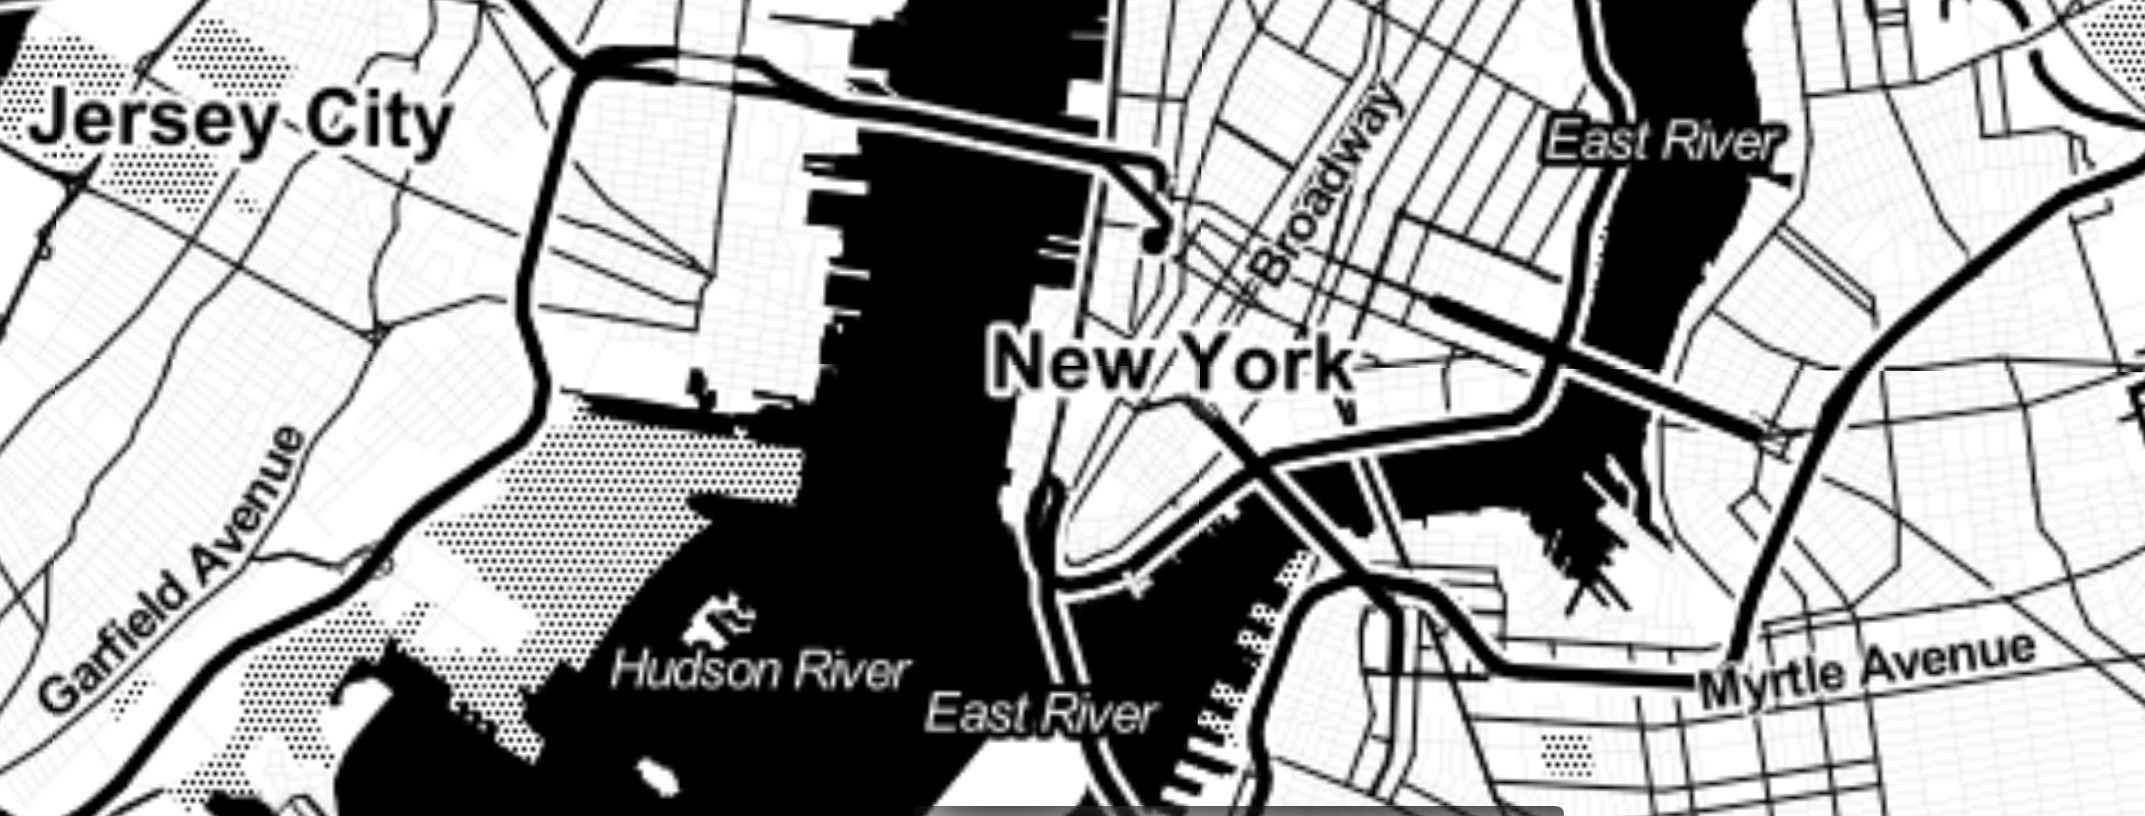
The above screenshot shows that you can easily combine custom raster tiles with other HERE SDK features. For example, you can render several MapMarker instances on top of the tile data from a tile server.
Note
One of the main advantages of custom raster layers is that you can easily enhance the HERE map styles with a transparent custom tile source on top, for example, to show weather data or any other data you want to see on top of the map. When using an opaque raster tile source, it is recommended to combine this with an empty base map style.
If you do not use an empty base map style, then the underlying map scheme will "shine" through until the raster layer tiles are loaded. The accompanying example app shows how this looks like.
There are certain other parameters that you can adjust:
- For example, if your app uses multiple raster layers, you can define a load priority when building a layer with the
MapLayerBuilder. This allows to specify an integer value: Higher values will lead to load the layer before layers with lower values. Note that this controls just the time when the layer is loaded, theMapLayerPrioritycontrols how the layer is rendered: For example,renderedLast()means that the layer will be rendered on top of all other layers. - For showing transparent map styles, set
rasterProviderConfig.hasAlphaChannelto true. - For more parameters, please consult the API Reference.