- Products ProductsLocation Services
Solve complex location problems from geofencing to custom routing
PlatformCloud environments for location-centric solution development, data exchange and visualization
Tracking & PositioningFast and accurate tracking and positioning of people and devices, indoors or outdoors
APIs & SDKsEasy to use, scaleable and flexible tools to get going quickly
Developer EcosystemsAccess Location Services on your favorite developer platform ecosystem
- Documentation DocumentationOverview OverviewServices ServicesApplications ApplicationsDevelopment Enablers Development EnablersContent ContentHERE Studio HERE StudioHERE Workspace HERE WorkspaceHERE Marketplace HERE MarketplacePlatform Foundation and Policy Documents Platform Foundation and Policy Documents
- Pricing
- Resources ResourcesTutorials TutorialsExamples ExamplesBlog & Release Announcements Blog & Release AnnouncementsChangelog ChangelogDeveloper Newsletter Developer NewsletterKnowledge Base Knowledge BaseFeature List Feature ListSupport Plans Support PlansSystem Status System StatusLocation Services Coverage Information Location Services Coverage InformationSample Map Data for Students Sample Map Data for Students
- Help
Key Concepts
In the following use case sections, we will guide you through the most common usage scenarios and reveal tips and easy-to-understand guidelines to help you get the most out of the HERE SDK for Android.
How to use this Guide?
You can read this guide in any order. All sections are independent from each other, making it easy to skip any section and to dive straight into the topics which you are most interested in.
- In the example section, you can find the example apps accompanying this user guide.
- If you are interested in building your first app showing a HERE map, take a look at the Get Started section to guide you through the first simple steps.
- In order to find supported features, take look at the feature list.
- Find here a Q & A section with the available use cases covered in this Developer Guide.
- If you are migrating from a 3.x legacy edition, take a look at our migration guide, where you can find a mapping table that shows the main 3.x features in comparison to the features of 4.x with links to reusable code snippets for each mentioned feature.
Note
If you cannot find the use case you are looking for, try to open the release notes and do a keyword search: The release notes contain all features that have been introduced since HERE SDK 4.8.2.0 - and most often they contain useful tips to get started and where to look for more content in the API Reference or this Developer Guide.
Another option is to browse the complete class list of the HERE SDK. Note that this list contains the full superset from the Navigate Edition.
Conventions
For this guide, we preferably avoid the use of lambda notations to show the full type of information and other details, such as callback or listener name. Since Android Studio supports one-click conversion between anonymous classes and lambdas, adapting the examples to suit your personal preference should be simple.
Dispose objects
All HERE SDK classes will be garbage collected by Android if the instance is no longer referenced or set to null.
When the app's lifetime has ended, you can free resources by calling SDKNativeEngine.getSharedInstance().dispose(). Also, all references to SDKNativeEngine must be set to null (if any). Calling dispose() will stop pending requests and close open files and databases that are still running. After calling dispose() any related HERE SDK feature should no longer be used - unless you initialize the HERE SDK again: If you have created engines like SearchEngine() or RoutingEngine() using the default constructor, then these instances need to be recreated as well. Basically, all engines that used the same instance of the SDKNativeEngine need to be recreated after it was disposed.
Callbacks and listeners
- The HERE SDK exposes callbacks for single event notification such as for search results.
- For reoccurring event notifications such as for gesture events, listeners are used. When multiple listeners can be set, then the method pattern
add_x()andremove_x()is used as naming convention. If only one listener can be set at a time, the property pattern is used. Set a listener property tonullto stop listening. - It is the responsibility of the developer to handle errors inside the scope of a callback gracefully: As a guideline, code that can throw an exception should be handled.
Debug logs
The LogControl class allows to log HERE SDK messages for various predefined LogLevel values - even for release builds of your app. Make sure to call the LogControl before initializing the HERE SDK:
// Disable any logs from HERE SDK.
// Make sure to call this before initializing the HERE SDK.
LogControl.disableLoggingToConsole();
The above allows to silence all HERE SDK related console logs. Note that this is not recommended for debug builds, as you may miss important log messages when you want to investigate issues.
Note that you can also use the LogAppender interface to insert your own log class into the LogControl class.
Code snippets
The shown code snippets cover best practice example code ready to be used for your own applications. However, for the sake of simplicity and to not shadow the educational approach of this guide, not all edge scenarios may be handled, especially when it comes to error handling or robust threading. In some cases, the obvious code is left out, but it can be found in the accompanying example apps that can be built and deployed instantly on any supported device with a set of valid HERE credentials.
Design principles
The accompanying example apps follow the same structure. As much as possible the HERE SDK example code is decoupled from the surrounding platform code. We hope this makes it easier to see the relevant parts of the shown APIs. Each example app follows the same entry point from which the HERE SDK is initialized. Since each app is focusing on a different aspect of the HERE SDK, that code can be found in a single class postfixed with "...Example.java" in its class name. Most often this class gets a reference to a MapView to start its work.
Following the popular POJO (PLain-Old-Java-Object) principle, the example code is kept free of most Android dependencies - instead it's mostly pure Java code that shows how the HERE SDK can be used.
Deprecations and beta versions
The team behind the HERE SDK is constantly trying to review and to improve the available APIs in order to provide the most flexible and yet the most simple-to-use APIs along with consistent interfaces.
At the same time, we want to ensure stable APIs across our releases that usually happen bi-weekly. Therefore, we follow a deprecation process: Our policy is to keep deprecated APIs for two major versions starting from the next major version after the deprecation was announced in our Release Notes, which means somewhere between six and nine months. In the API Reference you can always see which versions are affected, when an interface was marked as deprecated.
Some of our new and eventually unstable APIs are labelled as "beta" in our API Reference. Beta releases do not follow a deprecation process unless otherwise noted. If you use beta APIs, be aware that there could be a few bugs and unexpected behaviors.
Of course, we are always interested to hear your feedback for possible improvements.
Dependency management
Currently, dependency management, for example, via Gradle, is not yet supported. This means that the HERE SDK AAR binary must be copied locally to an application project as described in the Get Started section.
Use the HERE SDK with other frameworks
You can use the HERE SDK with other frameworks. For example, it is possible to combine an open street map with a SearchEngine, if you wish to do so.
-
Xamarin: The HERE SDK does not support Xamarin, but customers can implement a wrapper for Xamarin on top of the public APIs offered by the HERE SDK. We do no commit to make changes to the HERE SDK to support the related test tooling for Xamarin.
-
React Native: React Native is not supported. However, customers can implement a wrapper on their own, but we do not provide any support for such a task.
Is the HERE SDK thread-safe?
The HERE SDK is not guaranteed to be thread-safe and it is required to make calls to the SDK from the main thread. Internally, the HERE SDK will offload most of its work to a background thread, but callbacks to your code will always occur on the main thread. In general, thread safety is the responsibility of the caller. For example, it is unsafe to reuse an engine on different threads unless your code is synchronized.
Use TaskHandles to cancel asynchronous operations
Most asynchronous methods provide a TaskHandle as immediate return value, while the final result of the operation will be returned in a completion handler with a delay. The TaskHandle provides status information and it allows to abort an ongoing operation.
Unit tests
It's easy to write unit tests for your app logic that uses the HERE SDK as all classes are fully mockable. Inside the release package you can find a heresdk-mock JAR file that enables mocking of all HERE SDK classes. Below you can see an example using Mockito. This will also work with most other frameworks that allow to create mocked objects:
@RunWith(MockitoJUnitRunner.class)
public class TestExample {

    @Test
    public void testNonStaticMethod() {
        Angle angleMock = mock(Angle.class);

        when(angleMock.getDegrees()).thenReturn(10.0);

        assertEquals(10.0, angleMock.getDegrees());
        verify(angleMock, times(1)).getDegrees();
        verifyNoMoreInteractions(angleMock);
    }

    ...
}
Use the following dependency in your app's build.gradle setup:
def getHereSdkArtefactName() {
    def aarFile = fileTree(dir: 'libs', include: ['heresdk-*.aar']).first()
    // Filename without extension is necessary.
    return org.apache.commons.io.FilenameUtils.getBaseName(aarFile.name)
}

// Exclude HERE SDK's aar from unit test's dependencies.
configurations.testImplementation {
    exclude module: getHereSdkArtefactName()
}

dependencies {
    implementation(name: getHereSdkArtefactName(), ext:'aar')

    implementation 'com.android.support:appcompat-v7:28.0.0'
    implementation 'com.android.support.constraint:constraint-layout:1.1.3'

    // Keep in mind that the original HERE SDK aar must be excluded from
    // the test dependency, see above.
    testImplementation fileTree(dir: 'libs', include: ['*mock*.jar'])
    testImplementation 'junit:junit:4.12'
    testImplementation 'org.mockito:mockito-core:3.1.0'
}
With this setup your app will use the mock JAR when executing unit tests and the real HERE SDK AAR when building the app. Place the heresdk-edition-mock-version.jar into the same app/libs folder as the heresdk-edition-version.aar.
Coverage
Consult the coverage page to get detailed information on supported countries and languages per feature.
Engines
The HERE SDK contains several modules - or engines as we call them - to execute specific tasks such as calculating a route with the RoutingEngine or requesting search results via the SearchEngine. There are many more engines you can use with the HERE SDK and you can read more about them in the dedicated chapters below. However, most engines share common concepts that makes it easier to use them. For example:
- All engines execute their tasks asynchronously and receive their results on the main thread.
- All engines share similar interfaces, callbacks and error handling.
- It is possible to start multiple instances of an engine in parallel.
- An online connection is required.
Note that all HERE SDK engines, except for the SDKNativeEngine, can operate independently from each other and require HERE credentials to request data.
Note
The HERE SDK does not verify credentials at instantiation time. This only happens once a feature is used that requires authentification. In case of a failure, you will get with a dedicated error message. For example, the SearchEngine will reply with a SearchError.AUTHENTIFICATION_FAILED error. Other engines provide similar error codes.
Freemium credentials will work for most features, but not for features like offline maps which are exclusive for editions such as the Navigate Edition. If the credentials are invalid, the logs contain "[ERROR]" messages with a text similar to "Failed to get the authentication token: Authentication failed, error code: 1". This indicates that the credentials are not accepted when using a service. If you want to ensure that your credentials are set up correctly, use a premium feature with a specialized engine and check if the engine replies with an error value.
Any engine can be created using a parameterless constructor. Example:
try {
    searchEngine = new SearchEngine();
} catch (InstantiationErrorException e) {
    throw new RuntimeException("Initialization of SearchEngine failed: " + e.error.name());
}
Using this default constructor requires that the HERE SDK is already initialized and that a shared instance of the SDKNativeEngine was set either directly by calling SDKNativeEngine.setSharedInstance(sdkNativeEngine) or implicitly by calling SDKNativeEngine.makeSharedInstance(context, options).
For rare use case scenarios, you can use an overloaded constructor that takes an individually created instance of the SDKNativeEngine - as shown in the below section.
Note
It is possible to initialize an engine during the Application's onCreate() lifecycle. Any other point in time is also fine. For example, another good place to initialize an engine may be in an Activity's onCreate()-method.
Initialization
Since HERE SDK 4.12.1.0, the HERE SDK needs to be initialized manually. Follow the Get Started guide to see how this can be done.
- If your app immediately wants to show a map view after app start, then for most use cases it's sufficient to follow the Get Started guide. However:
- If your app needs to show a map view at a later point in time or if you want to delay initialization, then it is also possible to initialize the HERE SDK at a later point in time.
These are the steps to initialize the HERE SDK:
- Deactivate the deprecated
InitProvider(this step will become obsolete with HERE SDK 4.15.0). - Initialize the HERE SDK by creating
SDKOptionsand use them to create a newSDKNativeEngine.
The creation of the SDKNativeEngine and other engines such as the SearchEngine happens synchronously in a neglectable short amount of time.
You can initialize the HERE SDK in two ways:
- Create a shared instance of the
SDKNativeEnginewithSDKNativeEngine.makeSharedInstance(context, options). - Create individual instances of the
SDKNativeEngineviaSDKNativeEngine(context, options).
By calling SDKNativeEngine.makeSharedInstance(context, options) you create a shared instance of the SDKNativeEngine that can be used by the HERE SDK. This singleton approach allows easy creation of engines such as the SearchEngine, because you can use the default constructor (SearchEngine()) that requires no parameters. Internally, the SearchEngine will use the shared instance of the SDKNativeEngine you have created at initialization time. Therefore, when you re-initialize the HERE SDK, also all engines that have been created using the parameterless constructor, need to be created again.
Alternatively, for rare use cases, you can set an individual SDKNativeEngine instance for each of the feature engines:
SearchEngine searchEngine = new SearchEngine(sdkNativeEngine);
In general, it should not be necessary to initialize the SDKNativeEngine multiple times. Only one shared instance can be set at a time, which happens implicitly when calling SDKNativeEngine.makeSharedInstance(context, options). Alternatively, you can use the available constructor to create an instance of the SDKNativeEngine directly: If you create multiple instances individually, then no shared instance is set - and each feature engine needs to be created with an instance of a SDKNativeEngine as constructor parameter - like shown above. This way you can use feature engines such as the SearchEngine or the RoutingEngine with different instances of the SDKNativeEngine that can hold different SDKOptions.
Note that any individual instance can be set explicitly as shared instance by calling SDKNativeEngine.setSharedInstance(sdkNativeEngine). Attention: In this case, make sure to dispose() any previous instance by calling SDKNativeEngine.getSharedInstance().dispose(). Note that this is not necessary when creating a global instance by calling SDKNativeEngine.makeSharedInstance(context, options) - for convenience, this call internally disposes any previously shared instance.
Note
For most use cases it is not recommended to create multiple instances: In case of doubt, we recommend to initialize the HERE SDK only via SDKNativeEngine.makeSharedInstance(context, options) as shown in the Get Started guide. It is possible to use this initialization method each time the HERE SDK is needed and to dispose the SDKNativeEngine thereafter: For example, for each Activity. However, for most cases it can be more efficient if the HERE SDK is initialized only once during the lifetime of an application.
Multiple SDKNativeEngine instances can’t have the same access key id and the cache path is ensured to be unique per access key id. If a 2nd instance is created with an access key id that is already in use, then an InstantiationException is thrown: As a rule of thumb, when you need multiple instances, you also need a distinct set of credentials for each.
Note
The access key id part of your credentials is tied to the cache path. When credentials are changed at runtime, it may look like that the previous cache is gone, but it still exists and it is not cleared automatically after disposing the SDKNativeEngine or after setting new credentials. Since new credentials have been set, the cache path has just been changed. For example, when the previous credentials are restored, the previous cache can be used again.
More information on the cache can be found here.
Tip: Protect credentials
Your credentials should be protected to provide misuse by other parties that are not intended to use them.
One option to keep credentials secure is to store them on a secure server and retrieve them by requests using SSL connections.
For best practice, consider:
- To avoid keeping sensitive data in plain text.
- To transfer credentials using a secure communication channel.
- To store credentials using device security mechanisms and strong encryption ciphers.
- To add anti-tampering and anti-debugging code, so that a potential attacker cannot intercept data during dynamic runtime execution.
- Track the application usage to detect anomalies.
Use engines with or without a map view
Engines do not need a map view to operate. Therefore it is possible to run an engine as a stand-alone, without any map view added to your application. This way, you can build an app solely around a specific engine. With or without a map view - the procedure to create a new engine is exactly the same. Just make sure to initialize the HERE SDK beforehand.
HERE SDK options
The HERE SDK can be initialized with various options that can be set either directly for the SDKNativeEngine or when initializing the engine with SDKOptions.
None of the options are persisted - unless otherwise notes in the API Reference: This means, whenever you initialize the HERE SDK again, the previous options have to be set again if you want to keep them.
The same applies to options you can set for the various feature engines or when using a feature such as the RoutingEngine to calculate a Route with, for example, CarOptions.
Offline switch
The HERE SDK offers a global offline switch to make the HERE SDK radio-silent. This offline mode prevents the HERE SDK from initiating any online connection:
SDKNativeEngine.getSharedInstance().setOfflineMode(false);
This mode will, for example, prevent that new map tiles are loaded into the cache. If you are using the Navigate Edition, then you can still use features such as offline search (via dedicated engine), offline routing (via dedicated engine) or offline guidance.
It does not matter if the device itself is put to flight mode or not: When active, the switch will block any attempt from the HERE SDK to make a request. Therefore, no online data will be consumed until the offline mode is disabled again.
However, when initializing the HERE SDK a few requests may still be made - if you want to start your application offline already before initializing the HERE SDK, then set the flag offlineMode in SDKOptions to true. If you do not plan to change this at runtime, then this flag alone is enough to operate fully offline.
When the HERE SDK is switched offline, all ongoing and queued requests are stopped.
Backend services
For the features that do not work offline, the HERE SDK will request content internally from various backend services. All backend services are requested from the following domains:
here.comhereapi.com
Note that sub domains like for example, search.hereapi.com, are not listed here. We use a multitude of URLs, which are all under the here.com and hereapi.com domains. Each and every of these hostnames resolve to multiple sets of IP addresses, partially depending on the geography you’re in - detected via GeoIP. Also, the IP addresses are subject to change. If needed, it is recommended to enable / whitelist only the domains and use a wildcard to do the same for all possible sub domains.
Get access tokens for use with external REST APIs
Each time the HERE SDK is initialized, a new access token is generated internally. In case of multiple SDKNativeEngine instances, each instance holds its own token. You can also refresh and fetch the token via Authentication.authenticate(SDKNativeEngine.getSharedInstance(), callback) where the callback provides the token via authenticationData.token - you can use this token to access external HERE REST APIs.
For using the HERE SDK itself, you do not need to know the token - it is only required under the hood and the HERE SDK is handling the token generation automatically.
To protect our backends against misusage, a rate limit may apply when too many tokens are generated or when too many services are accessed in a too short time frame. In such a case, an engine will respond with a requestLimitReached error or similar. If you expect very high app usage, please talk to your HERE representative upfront to adapt the limits where needed.
Transactions and usage statistics
With the UsageStats class you can gathers statistics of the HERE SDK network usage to count all uploaded and downloaded data. Use SDKNativeEngine.getSdkUsageStats() and SDKNativeEngine.enableUsageStats() to retrieve the network statistics. With SDKNativeEngine.clearPersistentUsageStats() and SDKNativeEngine.clearUsageStatsCache() you reset the counters.
Note that calling enableUsageStats() is not persisted by the HERE SDK - same as for other settings: Therefore, UsageStats should be enabled every time before the initialization of the HERE SDK - if they have been enabled before at runtime and if you want to continue to track the network statistics.
Additionally, you can also use an external REST API to track transactions made with the HERE SDK. With the HERE Usage API you can request such data. Example for org ID org123456789 and a start and end date:
https://usage.bam.api.here.com/v2/usage/realms/org123456789?startDate=2022-07-01T10:39:51&endDate=2022-08-30T10:39:51
For more details, please refer to the cost management documentation.
Note that transactions and usage statistics require that a scope is set to differentiate multiple apps that use the same set of credentials. This includes also counting MAU. Although you will get charged per account and not per app, it makes sense to separate such data per app. If you are planning only a single app, then this is not relevant for you. Otherwise, please read more about this in the scope section below.
Set a scope to differentiate multiple apps
-
If you are developing only one app with the HERE SDK, you do not need to work with the Projects Manager that can be found on the HERE platform and you can skip the following section.
-
If you are developing multiple apps, then you need to reuse the same set of credentials. In order to be able to see statistics for each app individually, you need to set a scope. Make sure to read the following section.
In this section we will explain the correlation between app credentials and project scope. A project scope is used to determine specific services for a certain development project. Setting a scope will disable access to all other HERE services except specifically defined. Typically, when you develop an app with the HERE SDK, using one set of credentials for one app is sufficient. In that case setting a project scope is also not required. If this is the case, this section is not relevant for you.
If you intend to use one set of credentials for developing several different apps with the HERE SDK, please read on.
The HERE platform supports Projects, which allow developers to manage their app with additional possibilities to further restrict and customize app access and its entitlements. This is done with the Projects Manager you can find when you log into the HERE platform. See the IAM Guide for more details on how to set up a project.
Furthermore, setting an app with a project via Projects Manager will enable you to see the app in the downloaded usage report. This enables you to distinguish the usage statistics behind your app based on the project's HRN value in addition to the appId. A HERE Resource Name (HRN) uniquiely identifies your app / project.
Other use cases may be, for example, to define a debug scope for testing a staging app and a production scope for the final app.
Note that in your HERE account you can also find an Apps section, which does not refer to mobile applications. This Apps section can be ignored here, as in the following we only need the Projects Manager to configure a project that belongs to the mobile app you plan to develop.
Note
By default, when creating a project via Projects Manager an associated app needs to be configured with services and - depending on your edition - a map catalog to enable the relevant APIs you plan to use from the HERE SDK.
If this is not done, an app will use the default project settings and some requests made with the HERE SDK will lead to an error message that no access is given. An error like 403: Not authorized to access the resources may be visible in the logs and the HERE SDK will return an error enum value - depending on the individal engine that is executed.
How to set up the required HERE services
- Login to your
platform.here.comaccount. - Create a project and copy the project HRN string for later use. In the Projects Manager, you can define several projects / apps. Each project / app is identified through a unique HRN, for example: "hrn:here:authorization::olp-here-sdk-navigate:project/abcd123". The actual value is unique for your project / app.
- In the project settings, specify the required backend services needed by the HERE SDK (Resources -> Services -> "Link a service").
Required services
- HERE Isoline Routing
- HERE Network Positioning
- HERE Route Matching
- HERE Raster Tile
- HERE Routing
- HERE Routing - Intermodal
- HERE Routing - Transit
- HERE Search - Autocomplete
- HERE Search - Autosuggest
- HERE Search - Browse
- HERE Search - Forward Geocoder
- HERE Search - One Box Search
- HERE Search - Places ID Lookup
- HERE Search - Reverse Geocoder
- HERE Search - Traffic API
- HERE Vector Tile
- HERE Vector Tile - Traffic
Set the scope in your app
The next step is to set the project scope programmatically in your app. For this step, use the project HRN string you have copied above. For example: "hrn:here:authorization::olp-here-sdk-navigate:project/abcd123". The actual value is unique for your project / app.
Set the unique HRN value for your project as scope before initializing the HERE SDK:
sdkOptions.scope = "YOUR_PROJECT_HRN";
The screenshot below shows an example project with a Project ID and the resulting HRN value.
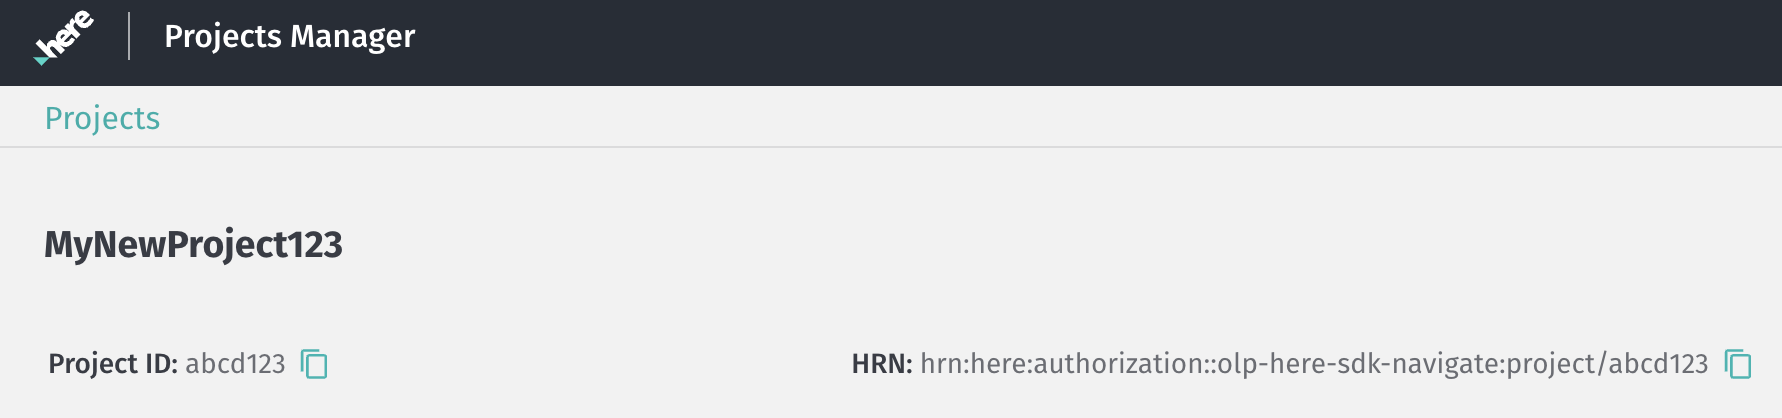
Note that a Project ID must be unique and cannot be changed for the lifetime of the organization's account. They affect also the HRN value as you can see in the screenshot. If the scope / HRN is set by an application, it will be used for authentication and the internal token creation of an application.
If an unknown scope is set, any authentication attempt would fail, and the application logs would indicate this.
More information can be found in the IAM guide. It contains also information on managing your projects.
How does the HERE SDK calculate monthly active users?
"Monthly Active User" or "MAU" means a unique device that calls HERE APIs through HERE SDK or uses the HERE SDK within a calendar month, as determined by HERE records.
More on the available MAU plans can be found in the Commercial Terms & Conditions.
Getting help when bugs occur
If you experience a crash or unexpected behavior, please Contact Us and provide detailed information on how to reproduce the issue.
Note that when crashes occur in the native C++ stack of the HERE SDK, then in the crash logs you will see only the addresses where the crash occurred. These addresses need to be symbolicated in order to see the stack trace where the crash occurred.
Note
Since HERE SDK 4.15.3 we include debug symbols in the HERE SDK package. Beneath the Android Archive (AAR) ZIP and the documentation ZIP files you can find a ZIP folder with the debug symbols: Inside, look for the .so files that are added for each device architecture.
In order to symbolicate crash logs on Android, you should have the NDK (Native Development Kit) stack tool and ADB (Android Debug Bridge) installed.
Make sure to use only the symbols that are shipped for the release you have integrated. Symbols from other releases will not work.
Symbolication of crash logs with Google Play Console
For apps that are deployed to Google Play Store you must upload the symbols files for each version of your app to get the crash reports as follows:
- Open Google Play Console and open your app.
- On the left menu, select Release > App bundle explorer.
- Using the picker in the top-right-hand corner, choose the ZIP archive with debug symbols.
- Select the Downloads tab, and scroll down to the "Assets" section.
- Click the upload arrow for the debug symbols as applicable to upload the symbols file for the version of your app. See here for more details.
- Afterwards, crashes and ANRs will be deobfuscated. To view deobfuscated stack traces for individual crashes and ANRs on your app, go to your Crashes & ANRs page in the Google Play Console.
Symbolication of crash logs can be done also locally
Follow the below steps to symbolicate a native crash locally:
- Use Logcat or ADB, gather the crash log and save it to a .txt file:
adb logcat -d > your_crashlog_filename.txt
- Get the symbols
.sofile that we ship with the release package. You can find these.sofiles insidedebug-symbolsZIP file. - Depending upon your build architecture copy the file path, either
arm64-v8aorarmeabi-v7a. - Run the
ndk-stacktool command :
path-to-Andorid-sdk/Android/sdk/ndk/24.0.8215888/ndk-stack -sym path-to-directory-with-binary-of-desired-architecture -dump path-to-crash.txt
Note that for this release, please use NDK 24.0.8215888.
Contact us
When you reach out to us, be sure to always include at least the HERE SDK version, platform, edition and logs. Below you can find a bug report check-list that will help us to respond faster:
- Type of the issue: For example, a crash or unexpected behavior.
- In case of a crash, provide a crash log including stack trace.
- In case of unexpected behavior, describe the expected versus the actual behavior.
- Is the issue a regression and if yes, since when?
- Description of the issue with detailed steps to reproduce it: Is the issue reproducible with one of our example apps, or can you provide code that isolates the issue?
- What APIs are called (if applicable)? Try to list all parameters and options.
- Reproducibility rate?
- Provide information about the environment such as OS, IDE, device / simulator (OS, name).
- Map data version / used catalog (if relevant).
- List other frameworks or plugins that are used, including version information (if applicable).
- Add screenshots or a video (if applicable).
- In case of search or routing issues, provide the geographic coordinates where the issue occurred or a GPX trace.
Make sure to check our Release Notes where we list known issues. Please also make sure to follow the latest instructions and code examples listed in the related sections of this Developer Guide to avoid implementation issues.
Generate meaningful logs
For many issues, the logs you see in your IDE's console are containing already the most relevant information. For crashes and ANRs you may want to dig deeper and take a look at the device logs. When you use logcat, use a timestamp to log only the most recent logs.
Example:
adb logcat -t '06-30 16:30:00.820' > /Users/name/Desktop/log.txt
Preferably, use adb logcat -c to clear all logs before starting to reproduce the issue.