- Products ProductsLocation Services
Solve complex location problems from geofencing to custom routing
PlatformCloud environments for location-centric solution development, data exchange and visualization
Tracking & PositioningFast and accurate tracking and positioning of people and devices, indoors or outdoors
APIs & SDKsEasy to use, scaleable and flexible tools to get going quickly
Developer EcosystemsAccess Location Services on your favorite developer platform ecosystem
- Documentation DocumentationOverview OverviewServices ServicesApplications ApplicationsDevelopment Enablers Development EnablersContent ContentHERE Studio HERE StudioHERE Workspace HERE WorkspaceHERE Marketplace HERE MarketplacePlatform Foundation and Policy Documents Platform Foundation and Policy Documents
- Pricing
- Resources ResourcesTutorials TutorialsExamples ExamplesBlog & Release Announcements Blog & Release AnnouncementsChangelog ChangelogDeveloper Newsletter Developer NewsletterKnowledge Base Knowledge BaseFeature List Feature ListSupport Plans Support PlansSystem Status System StatusLocation Services Coverage Information Location Services Coverage InformationSample Map Data for Students Sample Map Data for Students
- Help
Use the map
One of the core features of the HERE SDK for iOS is Mapping, which includes adding a map view, changing the location displayed by the map, and modifying its properties. The primary component of the mapping API is the map view, which is integrated as a UIView subclass. The map view represents a vector based view to display a map and various properties.
HERE map data is updated on a weekly basis to ensure you always get the freshest map data available. By integrating the map view you can automatically benefit from this.
Note
To create a simple map application, please refer to the Get Started section.
To manipulate the map and its properties it's best to start looking at the Camera section. More features include:
- Map gestures to handle common map gestures and default map behaviors like pan or rotate.
- Map schemes to instantly switch default map styles such as satellite versus normal map layer. More on the available map schemes you can find below.
- Map items to place objects and shapes onto the map and interact with them.
- Custom raster tiles to show custom server images as an additional map layer.
- Custom map styles to load custom map schemes.
Performance optimization
By default, the MapView is rendered with 60 frames per second (FPS). Via mapView.frameRate the maximum frame rate can be adjusted - for example, to reduce CPU / GPU usage on low end devices. It is also possible to deactivate automatic render cycles by setting FPS to 0. Setting negative values has no effect. The value can be set individually per MapView instance - in case your app contains multiple MapView's.
Another option is to use custom map styles that contain less elements to render.
To shrink the size of the HERE SDK framework, unused fonts can be removed before shipping an application.
Load map schemes
The HERE SDK supports several preconfigured map schemes:
-
liteDay: A simplified day version of lite map schemenormalDay, featuring fewer map elements and limited color palette. -
liteNight: A simplified night version of lite map schemenormalNight, featuring fewer map elements and limited color palette. -
liteHybridDay: A simplified day version of lite hybrid map schemehybridDay, featuring fewer map elements and limited color palette. -
liteHybridNight: A simplified night version of lite hybrid map schemehybridNight, featuring fewer map elements and limited color palette. -
normalDay: A lossless scaleable vector base map for usage during daylight. -
normalNight: A lossless scaleable vector base map for usage during night. -
hybridDay: A day version of a hybrid scheme combining satellite imagery with vector street network, map labels and POI information. -
hybridNight: A night version of a hybrid scheme combining satellite imagery with vector street network, map labels and POI information. -
satellite: A bitmap based map showing satellite imagery for various zoom stages. -
logisticsDay: A day version map scheme with focus on fleet management content.
Note that it is also possible to fully customize your own map styles, except for the satellite imagery.
Use the following code snippet to load a map scheme:
MapScheme mapScheme = MapScheme.normalDay;

_hereMapController.mapScene.loadSceneForMapScheme(mapScheme,
    (MapError? error) {
  if (error != null) {
    print('Map scene not loaded. MapError: ${error.toString()}');
    return;
  }

  // ...
});
It is recommended to use the day variants during day time when the surrounding light is brighter. The night variants are optimized for usage when there is less light. For example, an application may switch from day to night scheme when a driver is passing through a tunnel - if you are using the Navigate Edition, you can get notified on changed road attributes to know when you are driving through a tunnel. This allows an application to switch the map scheme on the fly. Note that this is not happening automatically.
The HERE SDK is also not automatically detecting the current time of the day to switch between day and night modes. An application may decide to do this based on the user's configuration or by checking the device clock.
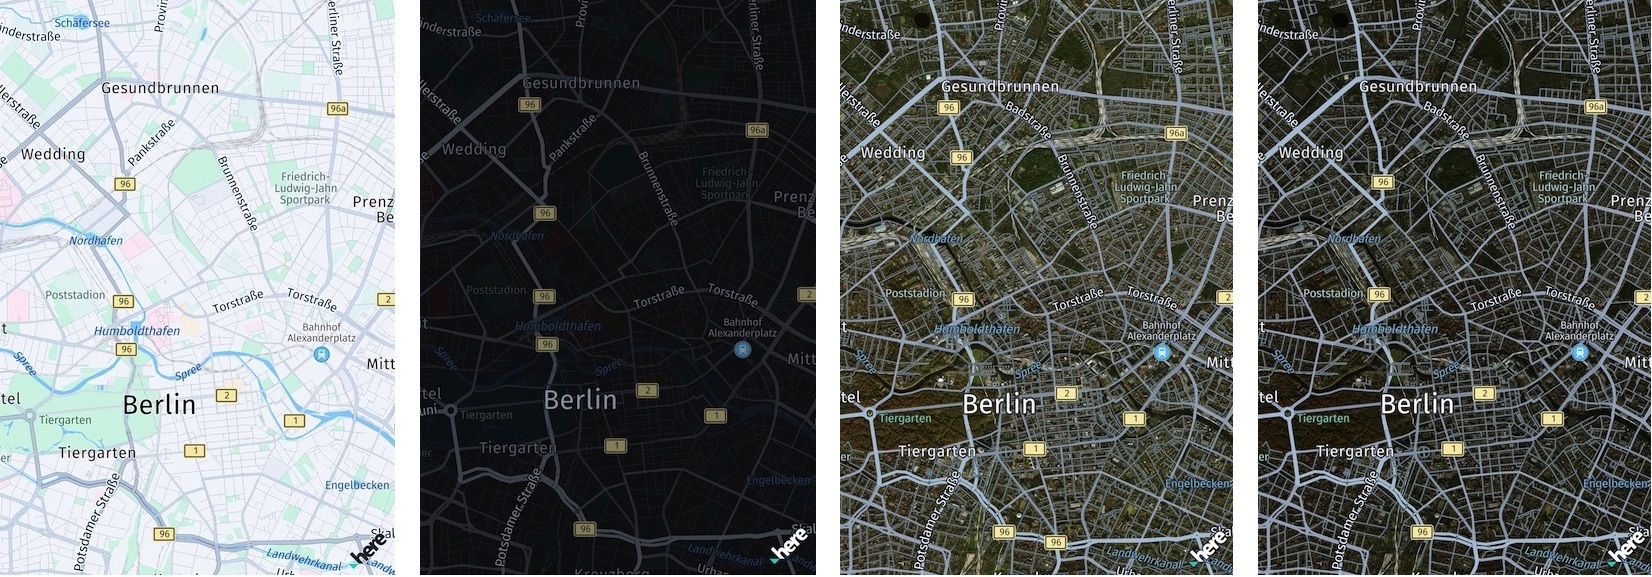
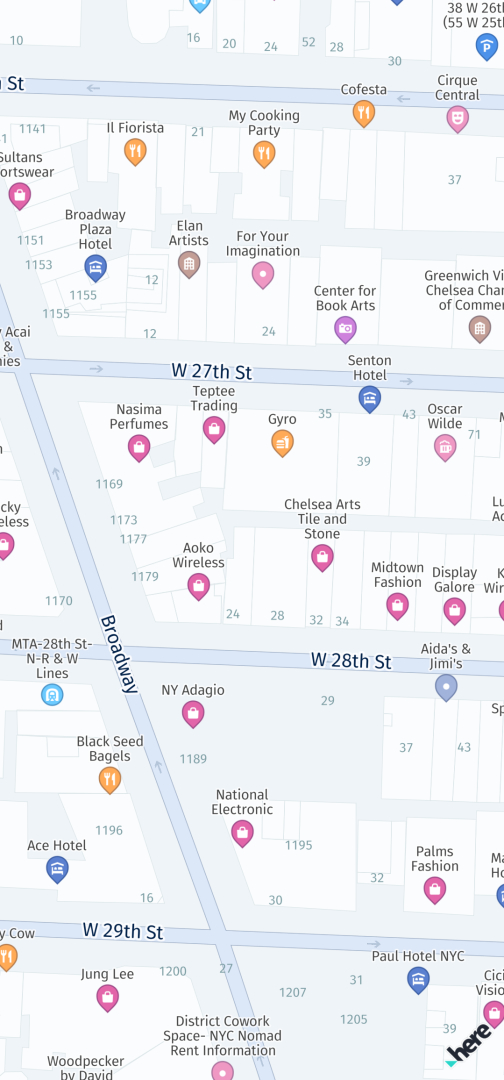
The available map styles are optimized to easily add additional content and overlays onto the base map without visual interference. The map schemes are less colorful and support a clean and neutral tone to maximize readability even in case of color blindness:
- The street network is designed in gray scales and provides a hierarchy through brightness, contrast and widths.
- Colors are overall rather bright set up.
- Key colors are grey, blue, green, white.
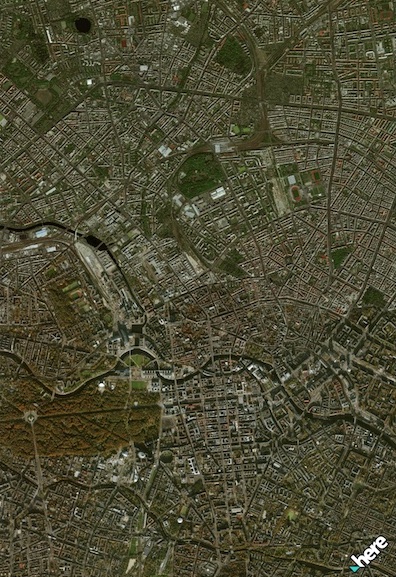
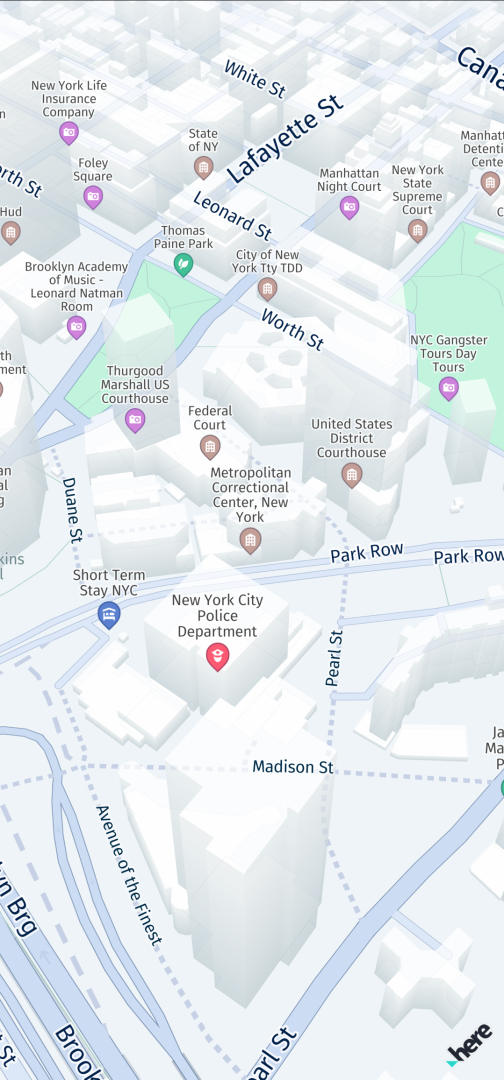
In addition, the HERE SDK offers a satellite scheme, that does not contain any labels:
Add map layers as map features
On top of map schemes, the HERE SDK allows to add certain kinds of layers - we call them map features - that show additional information such as the current traffic flow. Below you can see how such layers can be enabled:
_hereMapController.mapScene.enableFeatures({MapFeatures.trafficFlow: MapFeatureModes.trafficFlowWithFreeFlow});
_hereMapController.mapScene.enableFeatures({MapFeatures.trafficIncidents: MapFeatureModes.defaultMode});
_hereMapController.mapScene.enableFeatures({MapFeatures.safetyCameras: MapFeatureModes.defaultMode});
_hereMapController.mapScene.enableFeatures({MapFeatures.vehicleRestrictions: MapFeatureModes.defaultMode});
_hereMapController.mapScene.enableFeatures({MapFeatures.terrain: MapFeatureModes.defaultMode});
_hereMapController.mapScene.enableFeatures({MapFeatures.landmarks: MapFeatureModes.landmarksTextured});
_hereMapController.mapScene.enableFeatures({MapFeatures.extrudedBuildings: MapFeatureModes.defaultMode});
_hereMapController.mapScene.enableFeatures({MapFeatures.buildingFootprints: MapFeatureModes.defaultMode});
_hereMapController.mapScene.enableFeatures({MapFeatures.roadExitLabels: MapFeatureModes.roadExitLabelsAll});
Similarly, you can also disable a list of layers like shown below:
_hereMapController.mapScene.disableFeatures([MapFeatures.trafficFlow, MapFeatures.trafficIncidents]);
Note that not all feature layers are available for all editions. Take a look at the API Reference to know which layers are supported. Note that adding a layer may have a minimal performance impact on lower-end devices.
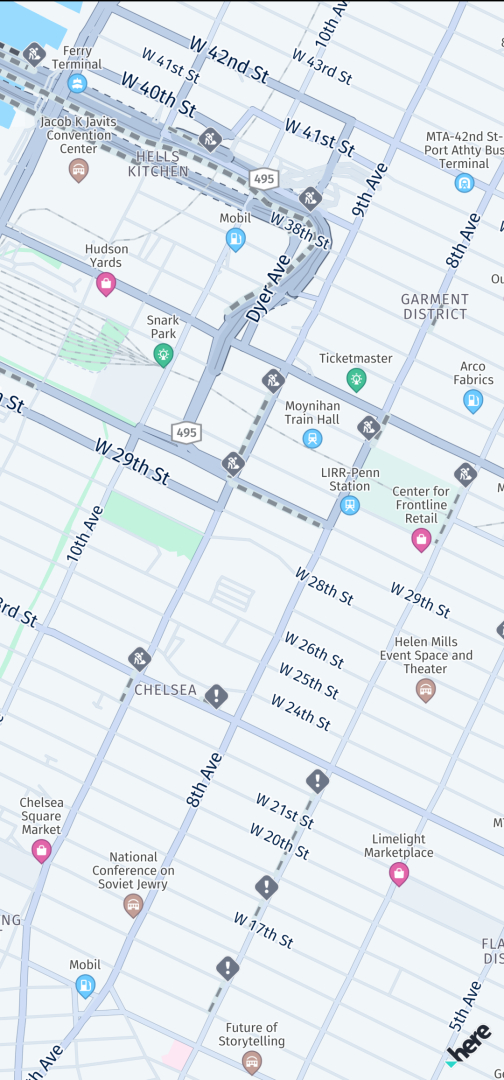
Below you can see screenshots for all supported map layers:
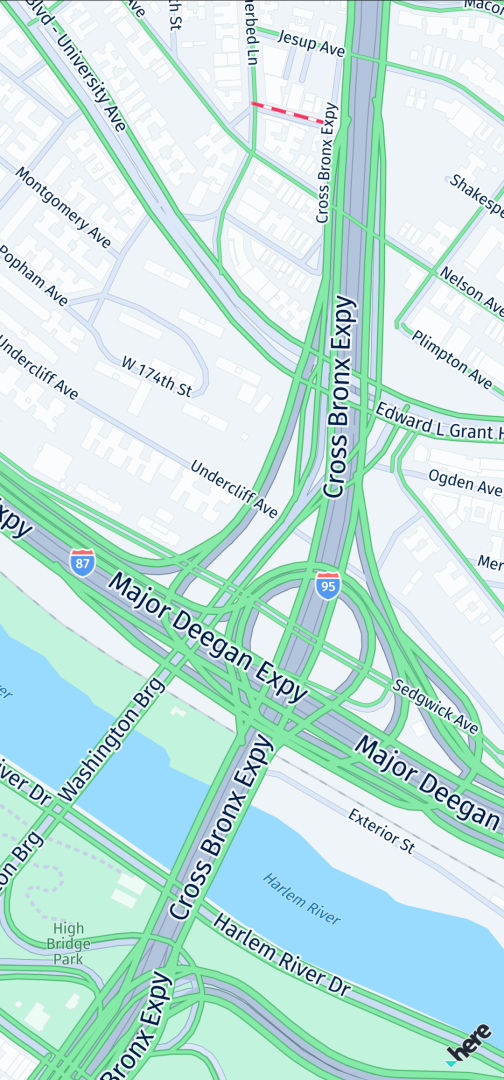 |  | 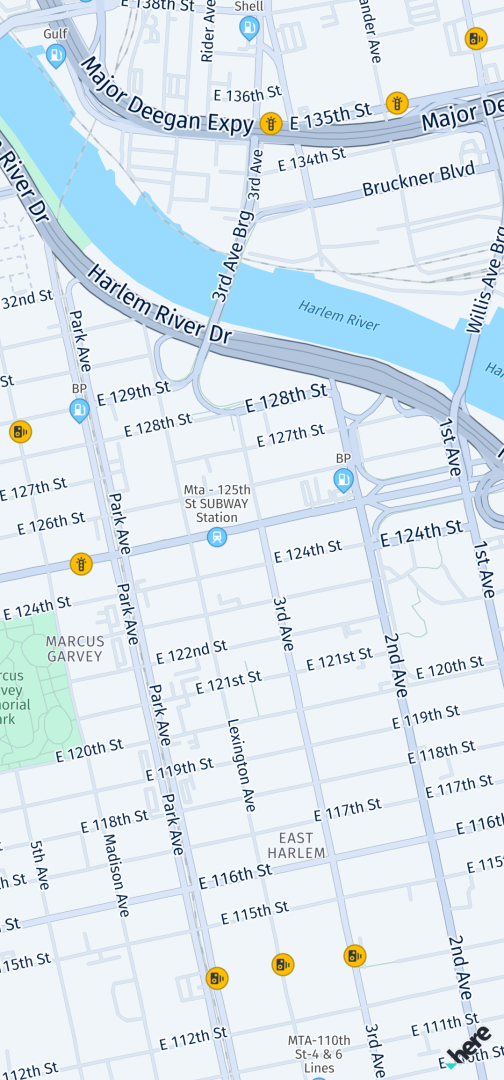 | 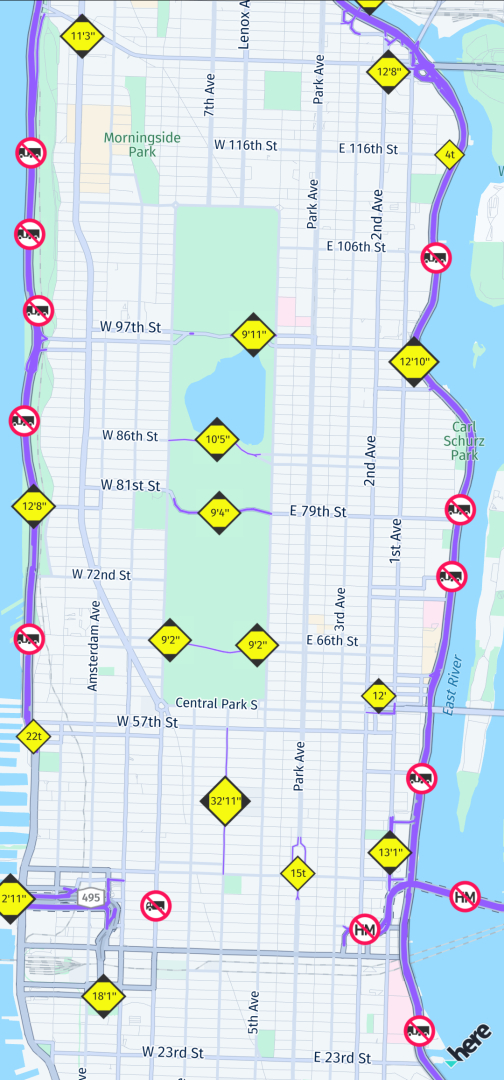 | 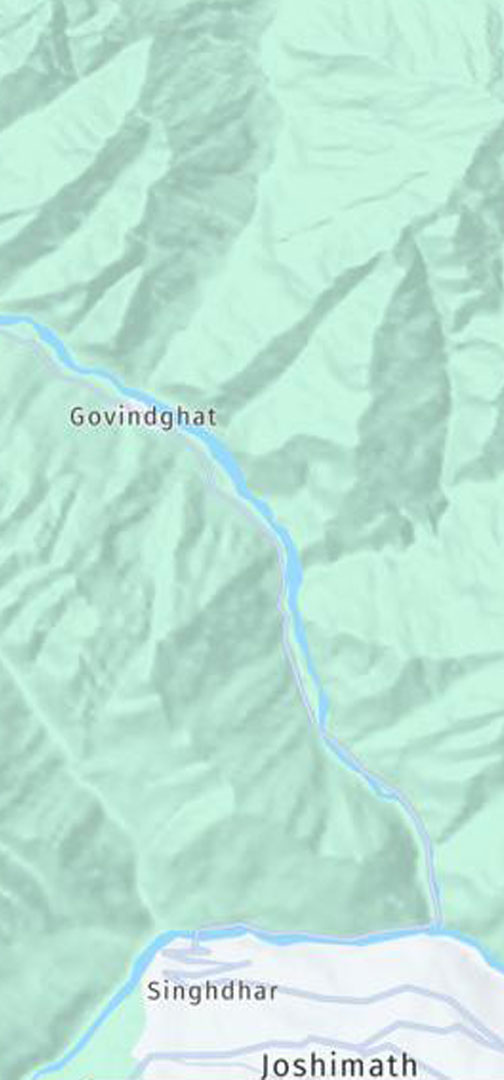 |
| The traffic flow layer shows active traffic jams on the streets. | The traffic incidents map layer shows incidents such as accidents, construction works, and more. | The safety cameras map layer shows speed warning cameras. | The vehicle restrictions map layer shows truck-specific information. | The terrain map layer shows hill shading. |
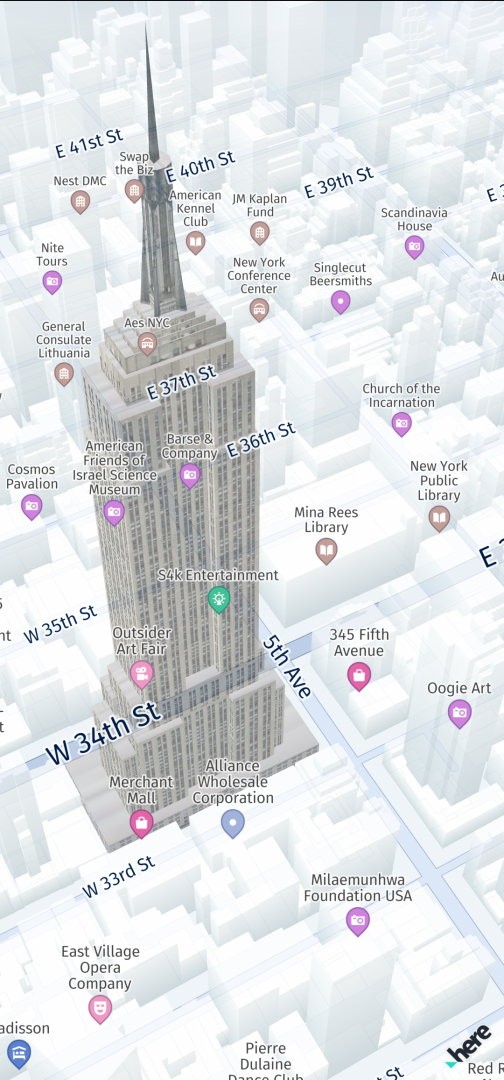 |  |  |  |
| The 3D landmarks map layer shows textured landmarks. | The extruded buildings map layer shows a 3D representation of buildings. | The building footprints map layer shows 2D footprints of buildings. | The building and footprints map layers are enabled by default. This is how it looks when they are disabled. |
Some layers allow to filter the shown content via MapContentSettings:
-
MapFeatures.trafficIncidents: UsefilterTrafficIncidents(List<TrafficIncidentType> trafficIncidents)to filter the displayed traffic incidents. -
MapFeatures.vehicleRestrictions: UsefilterVehicleRestrictions(TruckSpecifications truckSpecifications, List<HazardousMaterial> hazardousMaterials, TunnelCategory tunnelCategory)to filter the displayed truck restrictions.
Note: The map layers buildingFootprints & extrudedBuildings are enabled by default on the MapView.
Embedded POIs
Naturally, on the map you can find, by default, several icons for restaurants, public transit and other places of general interest. These POIs are called carto POIs and they can be picked by the user to get more details. You can also control the visibility of these embedded POIs.
Take a look at the map items section for more details.
Remove unused font files
The HERE SDK contains several font files to render map labels for all supported languages. If you want to optimize the size of the overall app, you can remove selected fonts.
For example, the DroidSansFallback font uses the Simplified Chinese ideographs for shared Unicode code points.
On iOS, to remove this font, open the HERE SDK plugin folder and remove the following files: ios/Frameworks/heresdk.xcframework/ios-arm64/heresdk.framework/geoviz/fonts/DroidSansFallback.ttf.
For Android: Follow the steps below.
The DroidSansFallback is packaged in the HERE SDK AAR file (which can be opened by appending ".zip" to the file name):
assets/geoviz/DroidSansFallback.ttf
As another example, if you do not need to render the full set of Japanese characters, you can remove:
assets/geoviz/NotoSansJP-Regular.otf
You can also remove other files, for example, the Navigate Edition contains voice packages like voice_package_ar-SA used to generate texts with guidance instructions for use in TTS engines.
In order to remove files, you need to edit the app's build.gradle file. In the android { ... } section add aaptOptions. The example below shows how to do this for the three mentioned file examples from above:
android {
  ...
  aaptOptions {
    ignoreAssetsPattern "!voice_package_ar-SA*:!DroidSansFallback.ttf:!NotoSansJP-Regular.otf"
  }
  ...
}
Note
When you remove a font, it is recommended to switch the map language to any other language than the removed font. At least one font needs to be left to see any map labels. Note that each time a label needs to be displayed in a language for a font that was removed an error message is logged - for each character that is missing.
Note that the size of a font file may range from a few hundred kilobytes to a few megabytes in size. After removing selected fonts your application consumes less space when it is installed on a device. The maximum amount that you can save with these steps is approximately 11 MB.
Set a map language
You can customize the language that is used on the map to show labels for streets, cities and other map data. By default, the local language of a region is used.
Use the HereMapController to set a languageCode as primaryLanguage. This sets the language for the world - or set null to switch back to the default behavior. If a language is not supported in any region of the world, the local language for that region is shown instead:
HereMapController.primaryLanguage = LanguageCode.hiIn;
Geopolitical views
The HERE SDK supports multiple geographic political views and disputed borders to show the map boundaries based on an international view (default) or a local country view. The local view affects only particular areas on the map when a border and possession or control is claimed by two or more political entities - usually a country.
You can change the default geopolitical view by setting a three letter language code for the politicalView member accessible via SDKOptions. The supported country codes are accessible on the coverage page.
When set, the map view will show all country boundaries according to the geopolitical view of the country that has been set and the MapView will show the borders accordingly.
Note that this is released as a beta feature.
If you want to change the geopolitical view at runtime, use the following code snippet:
// Optionally, clear the cache, so that changing the options has an immediate effect.
SDKCache.fromSdkEngine(SDKNativeEngine.sharedInstance).clearAppCache((error) {
    if (error != null) {
       // ...
    }
});

var options = SDKNativeEngine.sharedInstance.options;
options.politicalView = "ARG";
await SDKNativeEngine.sharedInstance?.dispose();

// Now initialize the HERE SDK again using the new options.
Make sure to call this not during any ongoing HERE SDK operation, as setting new options requires also to create a new shared instance. Ideally, set the options and the politicalView only once before initializing the HERE SDK for the first time during the app's lifecycle.
Availability of map data
By default, a few regions in the world including Japan, China and Korea, contain limited map data. To get access to the full map data, please get in contact with your HERE representative.
Map data format
The HERE SDK stores all kind of data in map tiles. This can include data needed for rendering purposes in the map view, but it is not limited to this. For example, map tiles also contain data about places or road attributes that are not visualized on the map view, but are needed for other purposes such as turn-by-turn navigation.
The information that is stored in a map tile is categorized into several layers that hold the information for such distinct topics as traffic or landmarks.
- Under the hood, the Navigate Edition uses the Optimized Client Map (OCM) catalog format which provides a compact, fast and flexible map. The OCM catalog is compiled from HERE Map Content (HMC).
- Internally, the Explore Edition uses a slightly different map format (OMV) which is not supporting the offline use case.
Adapt map caching
To better support online and offline use cases, the HERE SDK supports caching of downloaded vector map data. This happens in the background. While interacting with the map, the data is stored locally on the device and can be accessed even when the device loses connection or operates in an offline mode.
The integrated map caching mechanism supports the standard vector based map schemes - satellite images and other raster tiles are also cached, but in a different cache that is not configurable.
Please note that the amount of cached data is limited and will be overwritten with new map data while using the map. In most cases, this is sufficient to give the user the impression of a faster start-up time - as no additional data must be downloaded when you start an app again at the same location as before.
When the cache is full, a least recently used LRU) strategy is applied.
The cache path and maximum size can be specified when manually initializing the HERE SDK using SDKOptions. Note that the cache path can be also set via the Info.plist or AndroidManifest file. Check the Engines section for more details.
Note: There can be a separate cache defined for customer raster layers.
This is how you can clear the map cache:
SDKCache.fromSdkEngine(SDKNativeEngine.sharedInstance).clearAppCache((error) {
    if (error != null) {
       // ...
    }
});
Note that disposing the SDKNativeEngine.sharedInstance does not clear the cache.
By setting an empty string as cache path, you keep the default cache path - which is also accessible via SDKNativeEngine.sharedInstance?.options.cachePath:
// Specify credentials programmatically and keep default cache path by setting an empty string.
SDKOptions sdkOptions = SDKOptions.withAccessKeySecretAndCachePath("YOUR_ACCESS_KEY_ID", "YOUR_ACCESS_KEY_SECRET", "");
It is also possible to specify the cache path from the AndroidManifest file (in android folder of your app) or the Info.plist (in ios folder of your app). Consult the API Reference for the SDKNativeEngine to see an example.
Questions and answers around the map cache
-
What is a map tile? Map tiles are stored in the map cache. A map tile contains data relevant for search and routing, as well as vector data for the visual representation. It is stored in the Optimized Client Map (OCM) format. Map tiles are available for different zoom levels. A map tile may contain different data, depending on the zoom level.
-
What is the impact of missing data in the map cache? Usually, the map cache is never assumed to be complete and there can be always tiles missing for a surrounding area. This is because map tiles get loaded only on demand while they are rendered. When there are tiles missing from the map cache then, for example, the
OfflineSearchEnginewill not find POIs or road names that are part of the missing tiles and the HERE Rendering Engine cannot render such data. Also, theOfflineRoutingEnginemight fail - unless it finds a route around the missing tiles. Note that theOfflineSearchEngineand theOfflineRoutingEngineare not available for every edition. -
What is the size of the map cache? The size of the map cache can be changed by the application. Use at least 256 MB (default). Values above 512 MB or 1 GB are recommended. For turn-by-turn navigation (which is available e.g. for the
Navigate Edition), map tiles of zoom level 14 are needed, which equals a circle of roughly 2 km. However, this can vary a bit from location to location. -
What is the eviction policy of the cache? The HERE SDK uses a LRU (least recently used tile) logic to evict the tiles when the map cache becomes full. There is no sophisticated logic to evict, for example, tiles that are farther away from the current location - as it is not foreseeable which areas of the world the user might visit next. However, the map cache is not session-specific, its data from the last time the device was used, ie. from the last power cycle, is still there the next time the app is used. Note that the cache is specific per app, not per device.
-
Is any previously cached map tile searchable offline? Yes, it's always searchable with the
OfflineSearchEngine. However, sometimes not every map tile contains the same search results for every zoom level. Note that theOfflineSearchEngineis not available for every edition. -
Is only one map tile cached at a time? Yes, only one tile at a time may be added unless its location is on the edge of two tiles. Depending on the zoom level, rendering of the map view will require several tiles - this is not happening automatically and only when the zoom level changes.
-
Are satellite images cached? Yes, when the satellite map scheme is set, the corresponding imagery is also cached, but satellite images cannot be used after 1 day (for contractual reasons) and will be evicted. In this case, the HERE SDK checks if there are newer satellite map tiles available and if yes then the images are automatically updated in the cache. If the images have not been changed, then only the timestamp is updated so that the images can be reused after this check for another period of 1 day. However, the LRU strategy still applies. Note that non-satellite map tiles are only evicted when the cache is full - there is no staleness of old tiles and no automatic deletion of old tiles based on time.
-
Is there always "base map" available, such as a globe view? The HERE SDK downloads automatically the world tiles, ie. the top most zoom level tiles for the globe. This means that there is always a map available for the globe with a very limited amount of information for rendering purposes. The shapes of countries and continents are visible and capitols are shown with text labels.
-
Is the cache auto-cleared? No, a full cache is only cleared based on a LRU strategy (see above). If tiles have not been fully downloaded due to a connectivity interruption, these tiles are preserved and the download continues when connectivity resumes.
-
If connectivity is available, will a whole route be cached in advance? No, this is not happening automatically. However, you can use the
RoutePrefetcherto download map data into the cache along the route corridor. Look into the turn-by-turn navigation section for more details. Note that theRoutePrefetcheris not available for every edition.
HERE logo watermark
When using the HERE SDK, it is required that the HERE logo is always visible on the map view. By default, the HERE logo is located at the bottom right corner of the map. However, you can easily customize its location to meet your app design by calling setWatermarkLocation() on your map view controller. It is recommended to change the default placement, only when it is required due to overlapping UI elements. Note for very small views: If both edges of the map are less than 250 density independent pixels in size, the watermark will be hidden automatically.
Note
Only upon special agreement with HERE it is possible to remove the HERE logo.
Choose surface or texture view on Android devices
Depending on your application needs, the MapView supports two different native render modes for Android.
- By default,
MapRenderMode.surfaceis used, which offers the best performance, but may suffer from graphical glitches that may occur on Android 12 and 13. - For applications with complex and dynamic UI or with multiple
MapViewinstances consider to useMapRenderMode.textureto avoid graphical glitches. This mode may have a greater performance impact than using the defaultSurfaceView.
Choose the MapRenderMode via HereMapOptions.renderMode, which allows to set internally a native SurfaceView or TextureView for rendering.
Note that the TextureView should be used together with the Virtual Display mode (see below.)
On iOS devices, this mode will have no effect.
Hybrid composition
The HereMap on Android now allows to use Flutter's Hybrid Composition mode. By default, the Virtual Display mode is still used. In order to use the Hybrid Composition mode for native views, set the optional constructor parameter mode when creating a HereMap like this: HereMap(mode: NativeViewMode.hybridComposition, ...).
The Hybrid Composition mode is recommended for devices running Android 10 or higher. Note that it can cause performance impacts on lower Android versions. More information about Hybrid Composition and Virtual Display modes can be found here.
It is recommended to use the TextureView as renderMode together with the Virtual Display mode.
When using Hybrid Composition, you can use both available renderMode options, as per your need (see above).
Flutter recommends to use the Hybrid Composition mode to avoid graphical glitches that may happen after screen orientation changes on some Android devices.
Add support for CarPlay and Android Auto
Currently, the Flutter platform provides no direct support for Apple's CarPlay, Android Auto and Android Automotive.
If you are interested how CarPlay and Android Auto can be implemented with the native HERE SDK variants, take a look below:
-
Flutter allows to write custom platform-specific code using method channels.
-
Add support for CarPlay using the HERE SDK for iOS: Follow the Integrate a HERE Map into CarPlay tutorial to see how you can get started and show a map view on a car's head unit display.
-
Add support for Android Auto using the HERE SDK for Android: If you want to show a map view on the Desktop Head Unit, you need to render the map using a
MapSurfaceinstance. Follow the Integrate a HERE Map into Android Auto tutorial to see how this can be done.
The native SDKs for iOS and Android are already included as part of the Flutter plugin folder that comes bundled with the HERE SDK for Flutter download package. However, when you are trying to access native code, you need to integrate the Here SDK: For example, on Android you need to add the name of the AAR as it appears in the plugin folder in your app's build.gradle file. Similar steps for iOS are needed. Then you can access the native HERE SDK APIs from Java, Kotlin or Swift source files.
In order to simplify the map view handling a bit, you can access the following native classes MapSurfaceHost.kt, MapViewHost.kt and MapViewHost.swift that are part of the HERE SDK. For now, they are only meant for experimental use until further notice. With these host classes for each native view, e.g. MapView in Swift and MapSurface in Java, you can control the native view through a HereMapController from Dart side.
Usage example for Java:
import com.here.sdk.mapview.MapSurface;
import com.here.sdk.mapview.MapSurfaceHost;

...
MapSurfaceHost surfaceHost = new MapSurfaceHost(123, flutterEngine.getDartExecutor().getBinaryMessenger(), mapSurface);
Usage exampe for Swift:
import heresdk
import here_sdk

...
let mapViewHost = MapViewHost(viewIdentifier: 123,
                              binaryMessenger: FlutterBinaryMessenger,
                              mapView: MapView)
Then on Dart side, use the same view ID - "123" for example:
methodChannel.setMethodCallHandler((call) async {
  if (call.method == 'mapCreated') {
    print('ExampleApp - map surface created');

    HereMapController mapSurfaceController = HereMapController(123);
    bool success = await mapSurfaceController.initialize((event) {});
    if (!success) {
      print('ExampleApp -Failed to initialize controller');
      return;
    }

    mapSurfaceController.mapScene.loadSceneForMapScheme(MapScheme.normalNight, (MapError? error) {
      ...
    });
  }
Note that this does not include any Android Auto or CarPlay functionality. As of now, the created surface will be non-responsive to any gesture - even if there is a touch display available in-car.