- Products ProductsLocation Services
Solve complex location problems from geofencing to custom routing
PlatformCloud environments for location-centric solution development, data exchange and visualization
Tracking & PositioningFast and accurate tracking and positioning of people and devices, indoors or outdoors
APIs & SDKsEasy to use, scaleable and flexible tools to get going quickly
Developer EcosystemsAccess Location Services on your favorite developer platform ecosystem
- Documentation DocumentationOverview OverviewServices ServicesApplications ApplicationsDevelopment Enablers Development EnablersContent ContentHERE Studio HERE StudioHERE Workspace HERE WorkspaceHERE Marketplace HERE MarketplacePlatform Foundation and Policy Documents Platform Foundation and Policy Documents
- Pricing
- Resources ResourcesTutorials TutorialsExamples ExamplesBlog & Release Announcements Blog & Release AnnouncementsChangelog ChangelogDeveloper Newsletter Developer NewsletterKnowledge Base Knowledge BaseFeature List Feature ListSupport Plans Support PlansSystem Status System StatusLocation Services Coverage Information Location Services Coverage InformationSample Map Data for Students Sample Map Data for Students
- Help
Find traffic
With a dedicated TrafficEngine, you can query detailed and localizable information on current traffic incidents such as accidents, construction works or road closures.
You can visualize traffic incidents on the map by enabling the map layer state trafficIncidents with one line of code. The HERE SDK supports also a separate layer to see the current traffic situation by adding a trafficFlow layer.
In addition, you can also indicate the traffic along a Route instance as shown in the Directions section.
Show real-time traffic flow and incidents on the map
You can easily visualize traffic incidents on the map by enabling the map layer state trafficIncidents. The HERE SDK also supports a separate layer to see the current traffic situation. See the example below for how to show or hide a layer on the map.
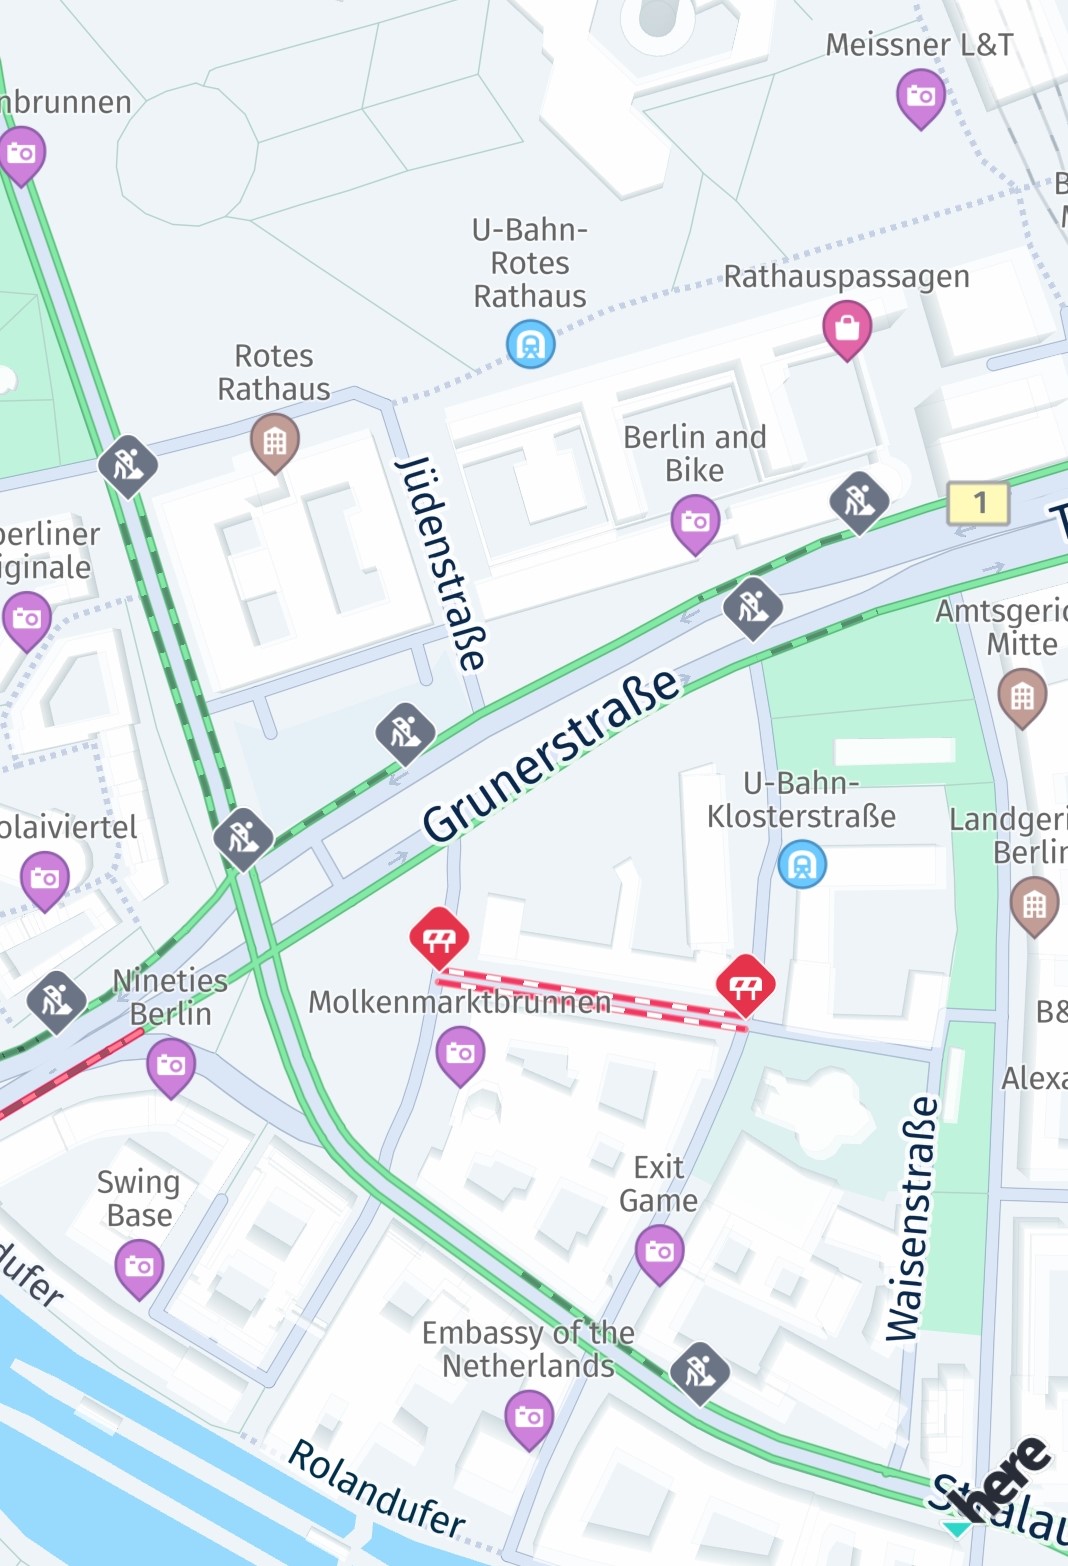
After a layer is set, the visible area of the map is automatically updated. So you can freely pan the map in all directions to see the latest traffic incidents.
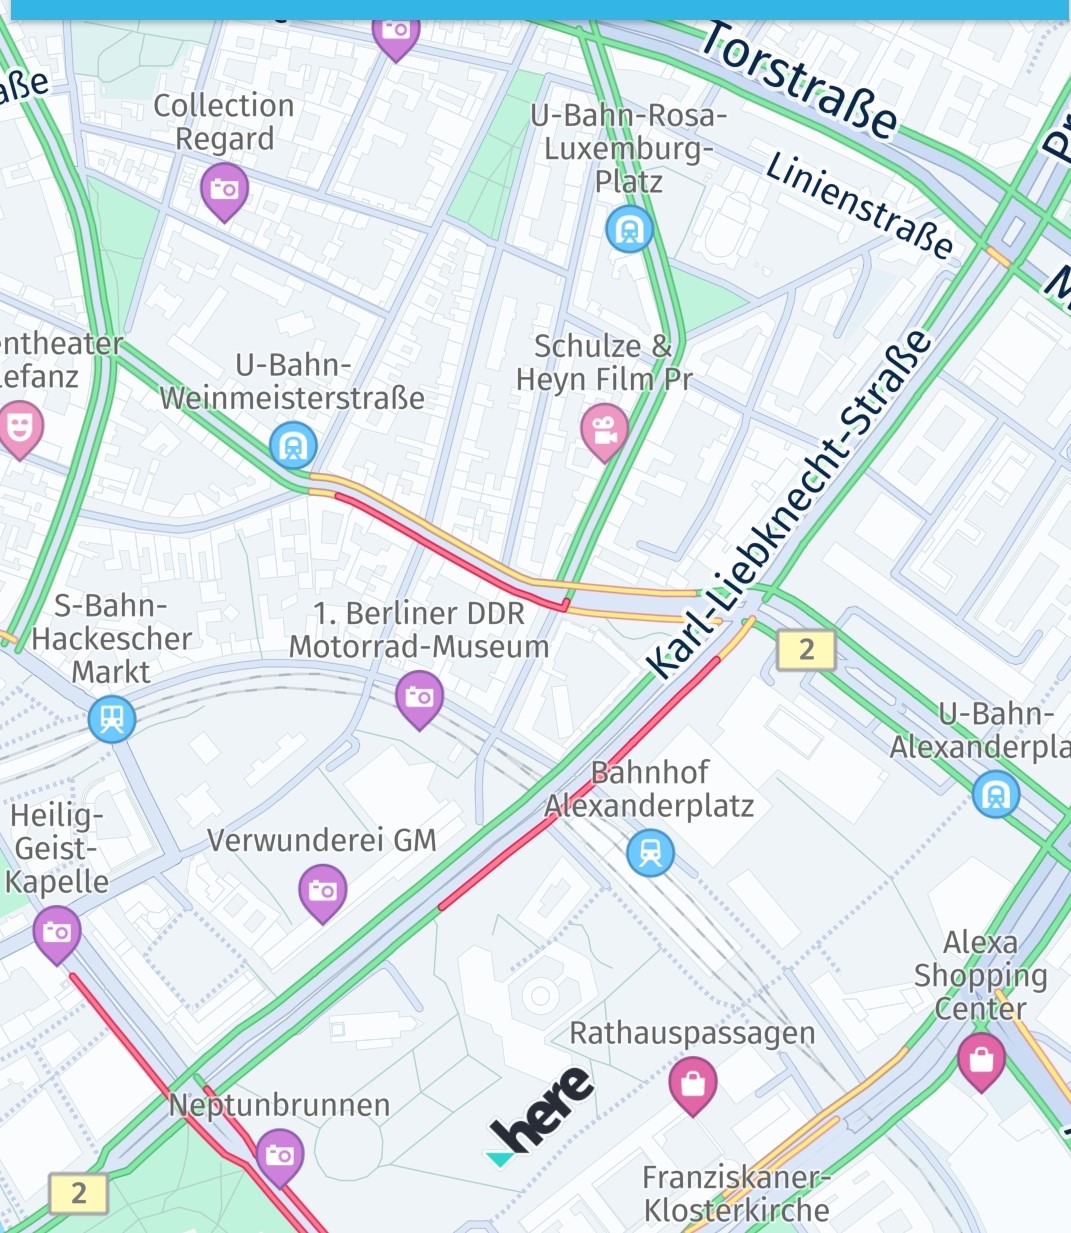
In many situations, drivers are interested in finding the fastest route based on the current traffic jams in a city - or outside a city. The HERE SDK allows you to show a layer holding all the current traffic jams, visualized by lines in different colors to indicate the severity of the jam - always updated in real-time. This feature requires an online connection and consumes slightly more data. However, the traffic lines are shown as part of the map tiles and are therefore highly performant.
Together - or independently - you can visualize such traffic information on the map with just a few lines of code:
_hereMapController.mapScene.enableFeatures({MapFeatures.trafficFlow: MapFeatureModes.trafficFlowWithFreeFlow});
_hereMapController.mapScene.enableFeatures({MapFeatures.trafficIncidents: MapFeatureModes.defaultMode});
Setting a new layer state is performed synchronously, but it requires a valid map scene that must have been loaded before. Also, setting a new layer state while a new map scene is being loaded, may result in an exception. For hiding feature layers, you can call:
_hereMapController.mapScene.disableFeatures([MapFeatures.trafficFlow, MapFeatures.trafficIncidents]);
The traffic flow lines are color coded as follows:
- Green: Normal traffic
- Amber/Yellow: High traffic
- Red: Very high traffic
- Black: Blocking traffic
A usage example is available on GitHub as part of the traffic_app example app.
Pick traffic incidents from the map
When the trafficIncidents is shown on the MapView, you can set up a tap handler and pick the traffic incidents to get more information.
void _setTapGestureHandler() {
  _hereMapController.gestures.tapListener = TapListener((Point2D touchPoint) {
    GeoCoordinates? touchGeoCoords = _hereMapController.viewToGeoCoordinates(touchPoint);
    // Can be null when the map was tilted and the sky was tapped.
    if (touchGeoCoords != null) {
      // Pick incidents that are shown in MapSceneLayers.trafficIncidents.
      _pickTrafficIncident(touchPoint);
    }
  });
}

// Traffic incidents can only be picked, when trafficIncidents is visible.
_pickTrafficIncident(Point2D touchPointInPixels) {
  Point2D originInPixels = new Point2D(touchPointInPixels.x, touchPointInPixels.y);
  Size2D sizeInPixels = new Size2D(1, 1);
  Rectangle2D rectangle = new Rectangle2D(originInPixels, sizeInPixels);

  _hereMapController.pickMapContent(rectangle, (pickMapContentResult) {
    if (pickMapContentResult == null) {
      // An error occurred while performing the pick operation.
      return;
    }

    List<PickTrafficIncidentResult> trafficIncidents = pickMapContentResult.trafficIncidents;
    if (trafficIncidents.length == 0) {
      print("No traffic incident found at picked location");
    } else {
      print("Picked at least one incident.");
      PickTrafficIncidentResult firstIncident = trafficIncidents.first;
      _showDialog("Traffic incident picked:", "Type: " + firstIncident.type.name);

      // Find more details by looking up the ID via TrafficEngine.
      _findIncidentByID(firstIncident.originalId);
    }

    // Optionally, look for more map content like embedded POIs.
  });
}
With the tap handler, we get the touched location in view coordinates that can be passed to mapView.pickMapContent(). Here, we just use a point-sized rectangle, but you can also enlarge the pick area to include more content at once.
The callback provides a PickMapContentResult which can contain a TrafficIncidentResult, but also other embedded types like default POI markers, that are always visible on the map. The TrafficIncidentResult type already provides most information about the incident, but to get all available information, we can use the TrafficEngine (see also below) to search for the picked incident by ID:
_findIncidentByID(String originalId) {
  TrafficIncidentLookupOptions trafficIncidentsLookupOptions = new TrafficIncidentLookupOptions();
  // Optionally, specify a language:
  // the language of the country where the incident occurs is used.
  // trafficIncidentsLookupOptions.languageCode = LanguageCode.EN_US;
  _trafficEngine.lookupIncident(originalId, trafficIncidentsLookupOptions,
      (trafficQueryError, trafficIncident) {
    if (trafficQueryError == null) {
      print("Fetched TrafficIncident from lookup request." + " Description: " + trafficIncident!.description.text);
    } else {
      _showDialog("TrafficLookupError:", trafficQueryError.toString());
    }
  });
}
Query incidents with the TrafficEngine
With the TrafficEngine, you can retrieve detailed information about ongoing traffic incidents. You can search for incidents along a route via a GeoCorridor, in a GeoBox or in a GeoCircle.
You can also set multiple options, for example, to search only for specific types of incidents. As a result you get results on the affected vehicle types, date information, location information, localizable descriptions, summaries and much more.
Start by creating a new instance of the TrafficEngine:
try {
  _trafficEngine = TrafficEngine();
} on InstantiationException {
  throw ("Initialization of TrafficEngine failed.");
}
Below we search inside a GeoCircle for possible TrafficIncidents:
void _queryForIncidents(GeoCoordinates centerCoords) {
  double radiusInMeters = 1000;
  GeoCircle geoCircle = GeoCircle(centerCoords, radiusInMeters);
  TrafficIncidentsQueryOptions trafficIncidentsQueryOptions = TrafficIncidentsQueryOptions();
  // Optionally, specify a language:
  // the language of the country where the incident occurs is used.
  // trafficIncidentsQueryOptions.languageCode = LanguageCode.enUs;
  _trafficEngine.queryForIncidentsInCircle(geoCircle, trafficIncidentsQueryOptions,
      (TrafficQueryError? trafficQueryError, List<TrafficIncident>? trafficIncidentsList) {
    if (trafficQueryError != null) {
      _showDialog("TrafficQueryError", "Error: " + trafficQueryError.toString());
      return;
    }

    // If error is null, list is guaranteed to be not empty.
    String trafficMessage = "Found ${trafficIncidentsList!.length} result(s). See log for details.";
    TrafficIncident? nearestIncident = _getNearestTrafficIncident(centerCoords, trafficIncidentsList);
    if (nearestIncident != null) {
      trafficMessage += " Nearest incident: " + nearestIncident.description.text;
    }
    _showDialog("Nearby traffic incidents", trafficMessage);

    for (TrafficIncident trafficIncident in trafficIncidentsList) {
      print(trafficIncident.description.text);
    }
  });
}
For each found TrafficIncident, we log its description. If we search in Germany, then by default the results will be in German. This may sound like this:
Berlin, Sachsendamm zwischen Gotenstraße und Priesterweg Fahrbahn auf einen Fahrstreifen verengt, Staugefahr, Bauarbeiten, bis voraussichtlich 20.02.2028
You can also specify another language, for example, by setting this:
trafficIncidentsQueryOptions.languageCode = LanguageCode.enUs;
Note that MapSceneLayers.trafficIncidents is a layer that renders traffic icons and lines to indicate the location of incidents.
Each TrafficIncident contains a GeoPolyline that indicates its location. By comparing a tapped location on the map with the geographic coordinates contained in the polyline, you can find the closest incident to a tapped location on the map:
TrafficIncident? _getNearestTrafficIncident(
    GeoCoordinates currentGeoCoords, List<TrafficIncident> trafficIncidentsList) {
  if (trafficIncidentsList.length == 0) {
    return null;
  }

  // By default, traffic incidents results are not sorted by distance.
  double nearestDistance = double.maxFinite;
  TrafficIncident? nearestTrafficIncident;
  for (TrafficIncident trafficIncident in trafficIncidentsList) {
    // In case lengthInMeters == 0 then the polyline consistes of two equal coordinates.
    // It is guaranteed that each incident has a valid polyline.
    for (GeoCoordinates geoCoords in trafficIncident.location.polyline.vertices) {
      double currentDistance = currentGeoCoords.distanceTo(geoCoords);
      if (currentDistance < nearestDistance) {
        nearestDistance = currentDistance;
        nearestTrafficIncident = trafficIncident;
      }
    }
  }

  return nearestTrafficIncident;
}
Of course, it is also possible to render the polyline of an incident by yourself on the map, by adding a MapPolyline. You can also add your own icons as MapMarker - depending on the type of the incident you may decide to choose a different image.